Cloud Installation
Install API
Setup Git repository
Using the command line, navigate to the /api folder.
Initialize a new repository.
git initAdd all the files to the repository.
git add .Commit the changes made to the repository.
git commit -m "Initial commit"Go to GitHub, and create a new repository.
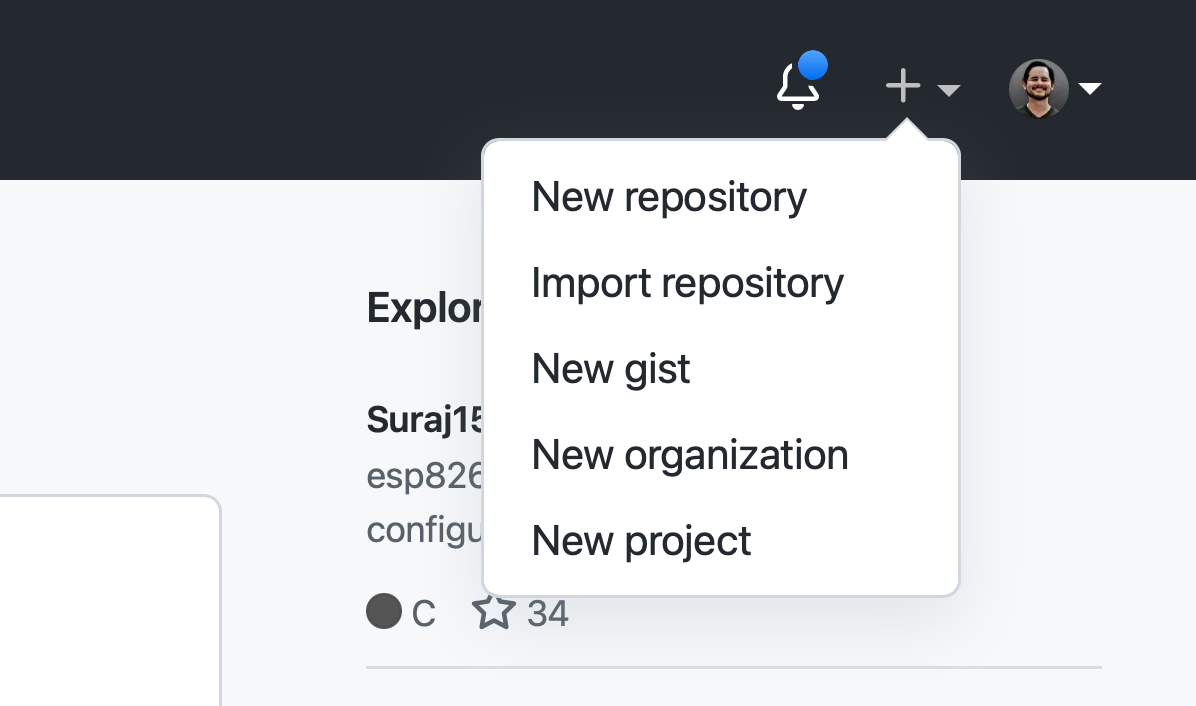
Enter a repository name, choose Private and click Create repository.
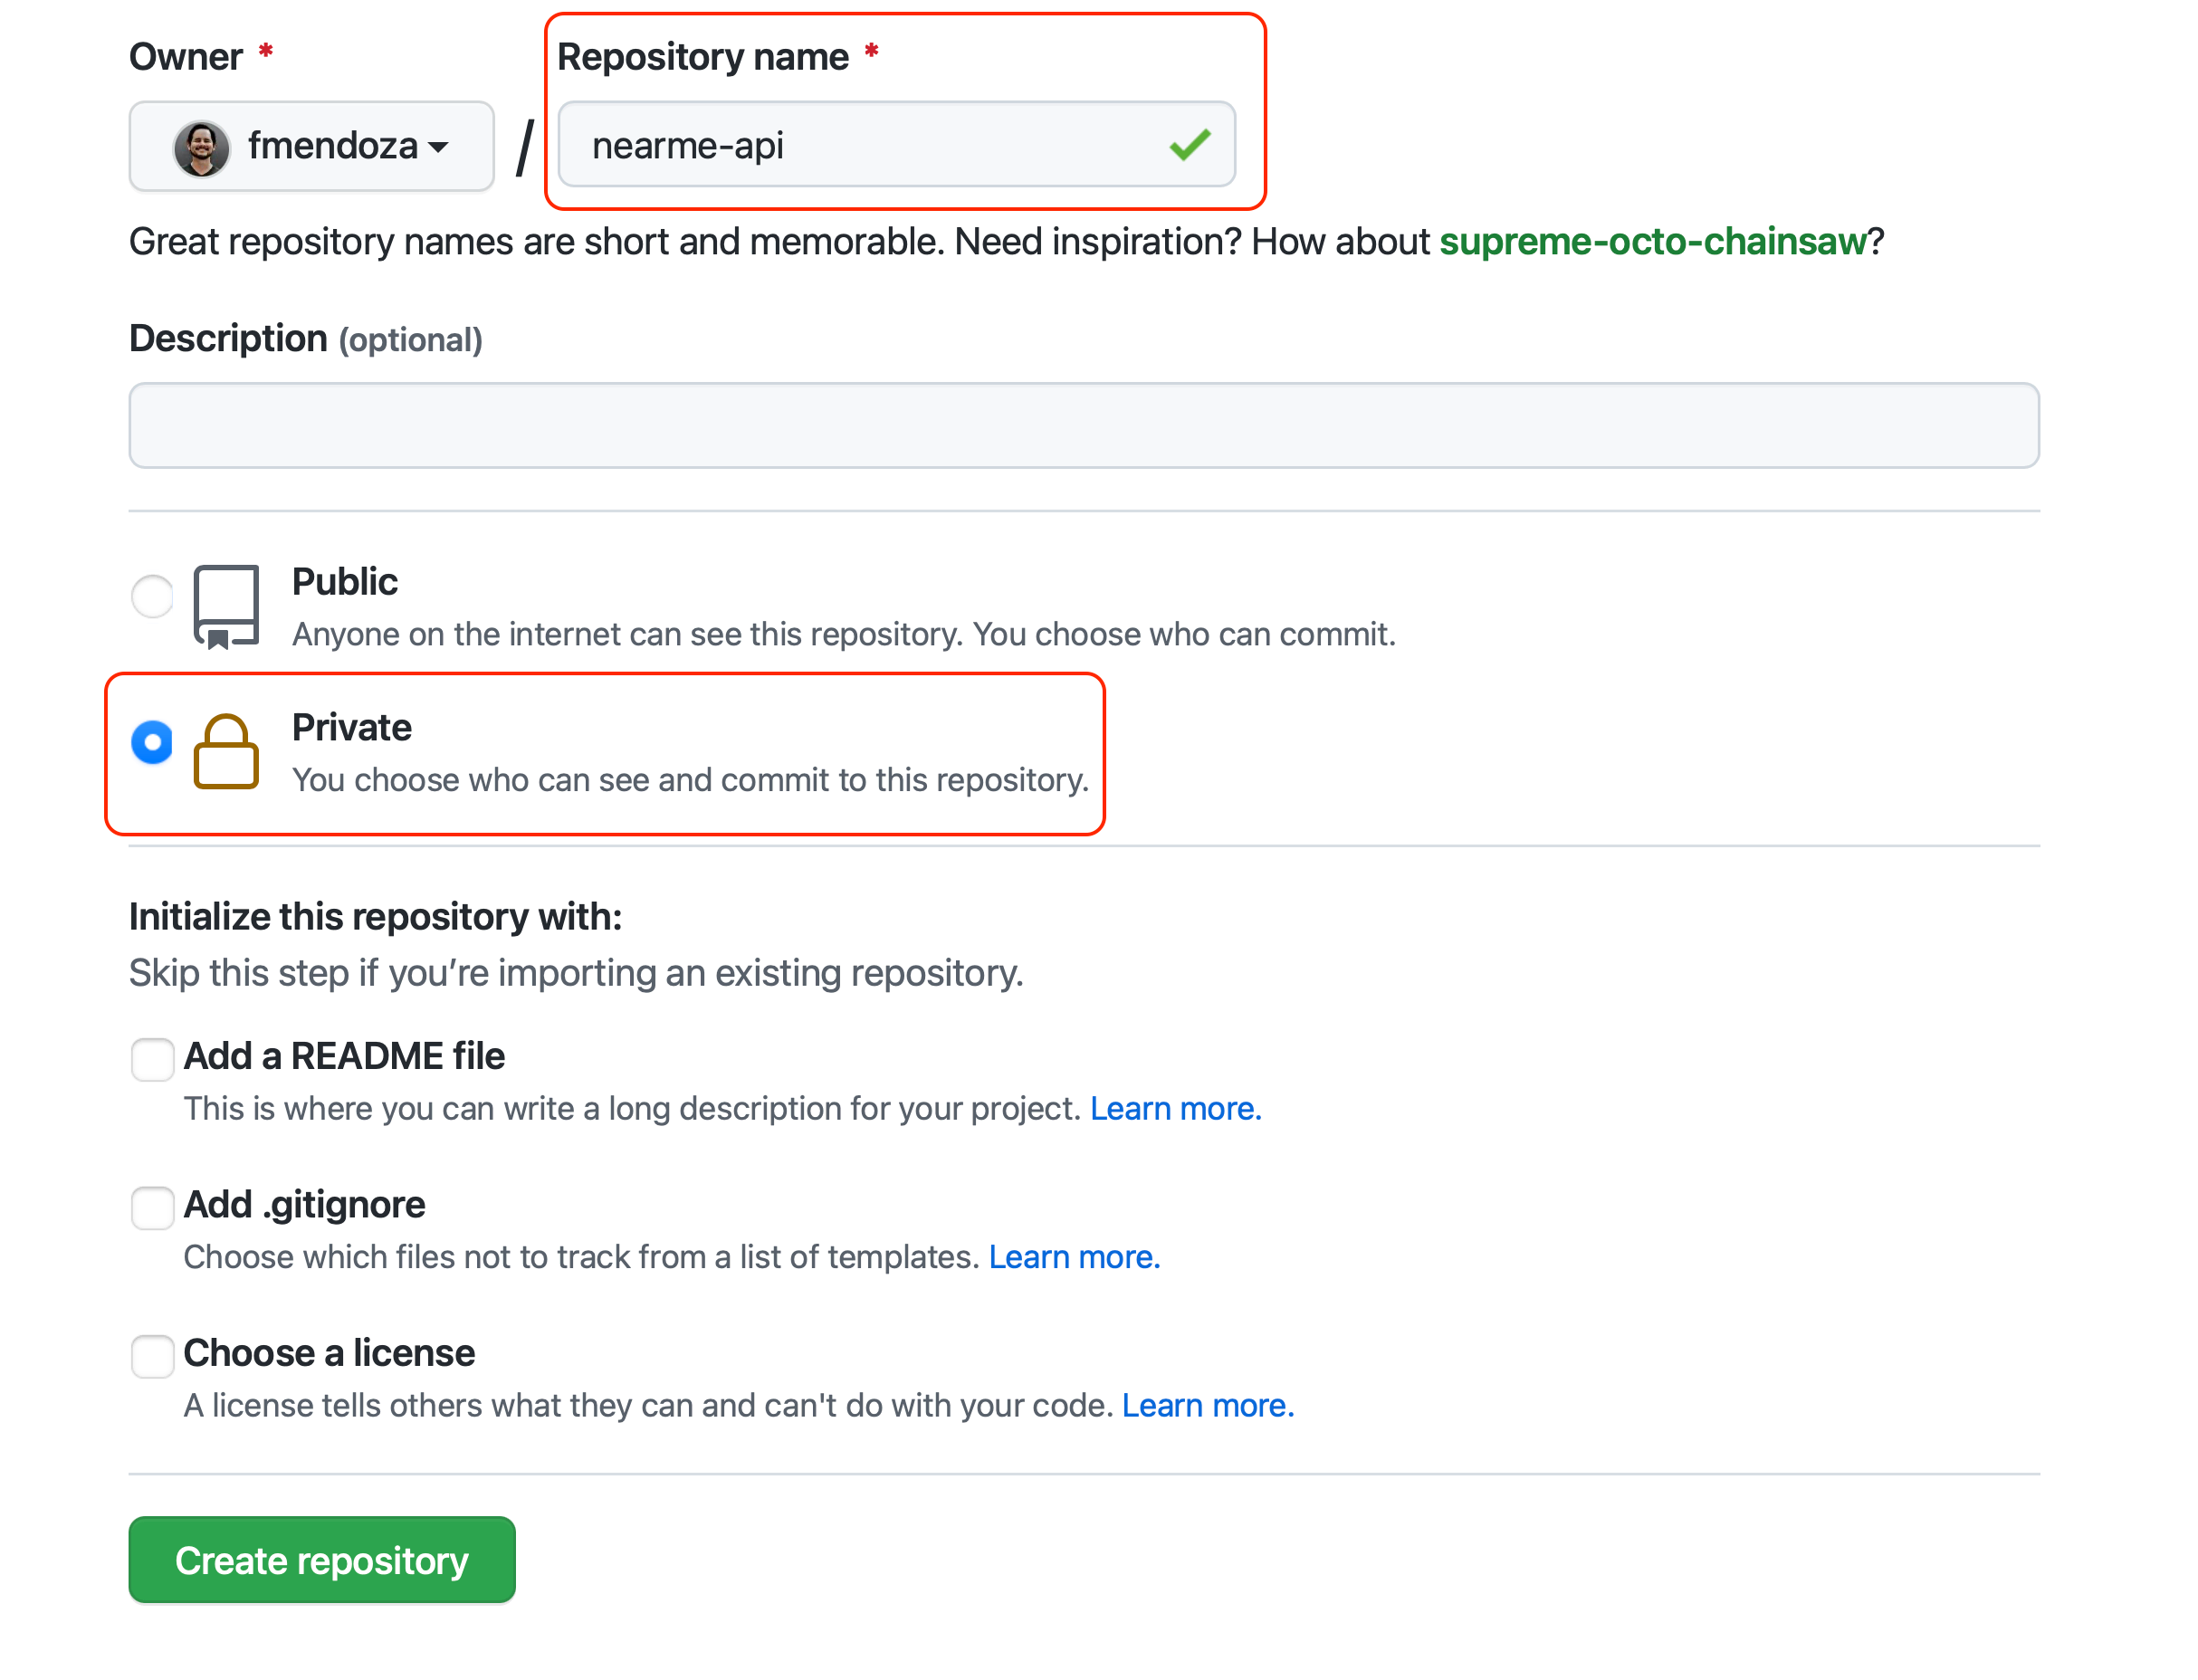
Copy the repo URL and add the remote:
git remote add origin git@github.com:user/nearme-api.gitReplace user and nearme-api with your username and repo name.
Push the code to the repo:
git push -u origin masterApp Platform
Setup Database
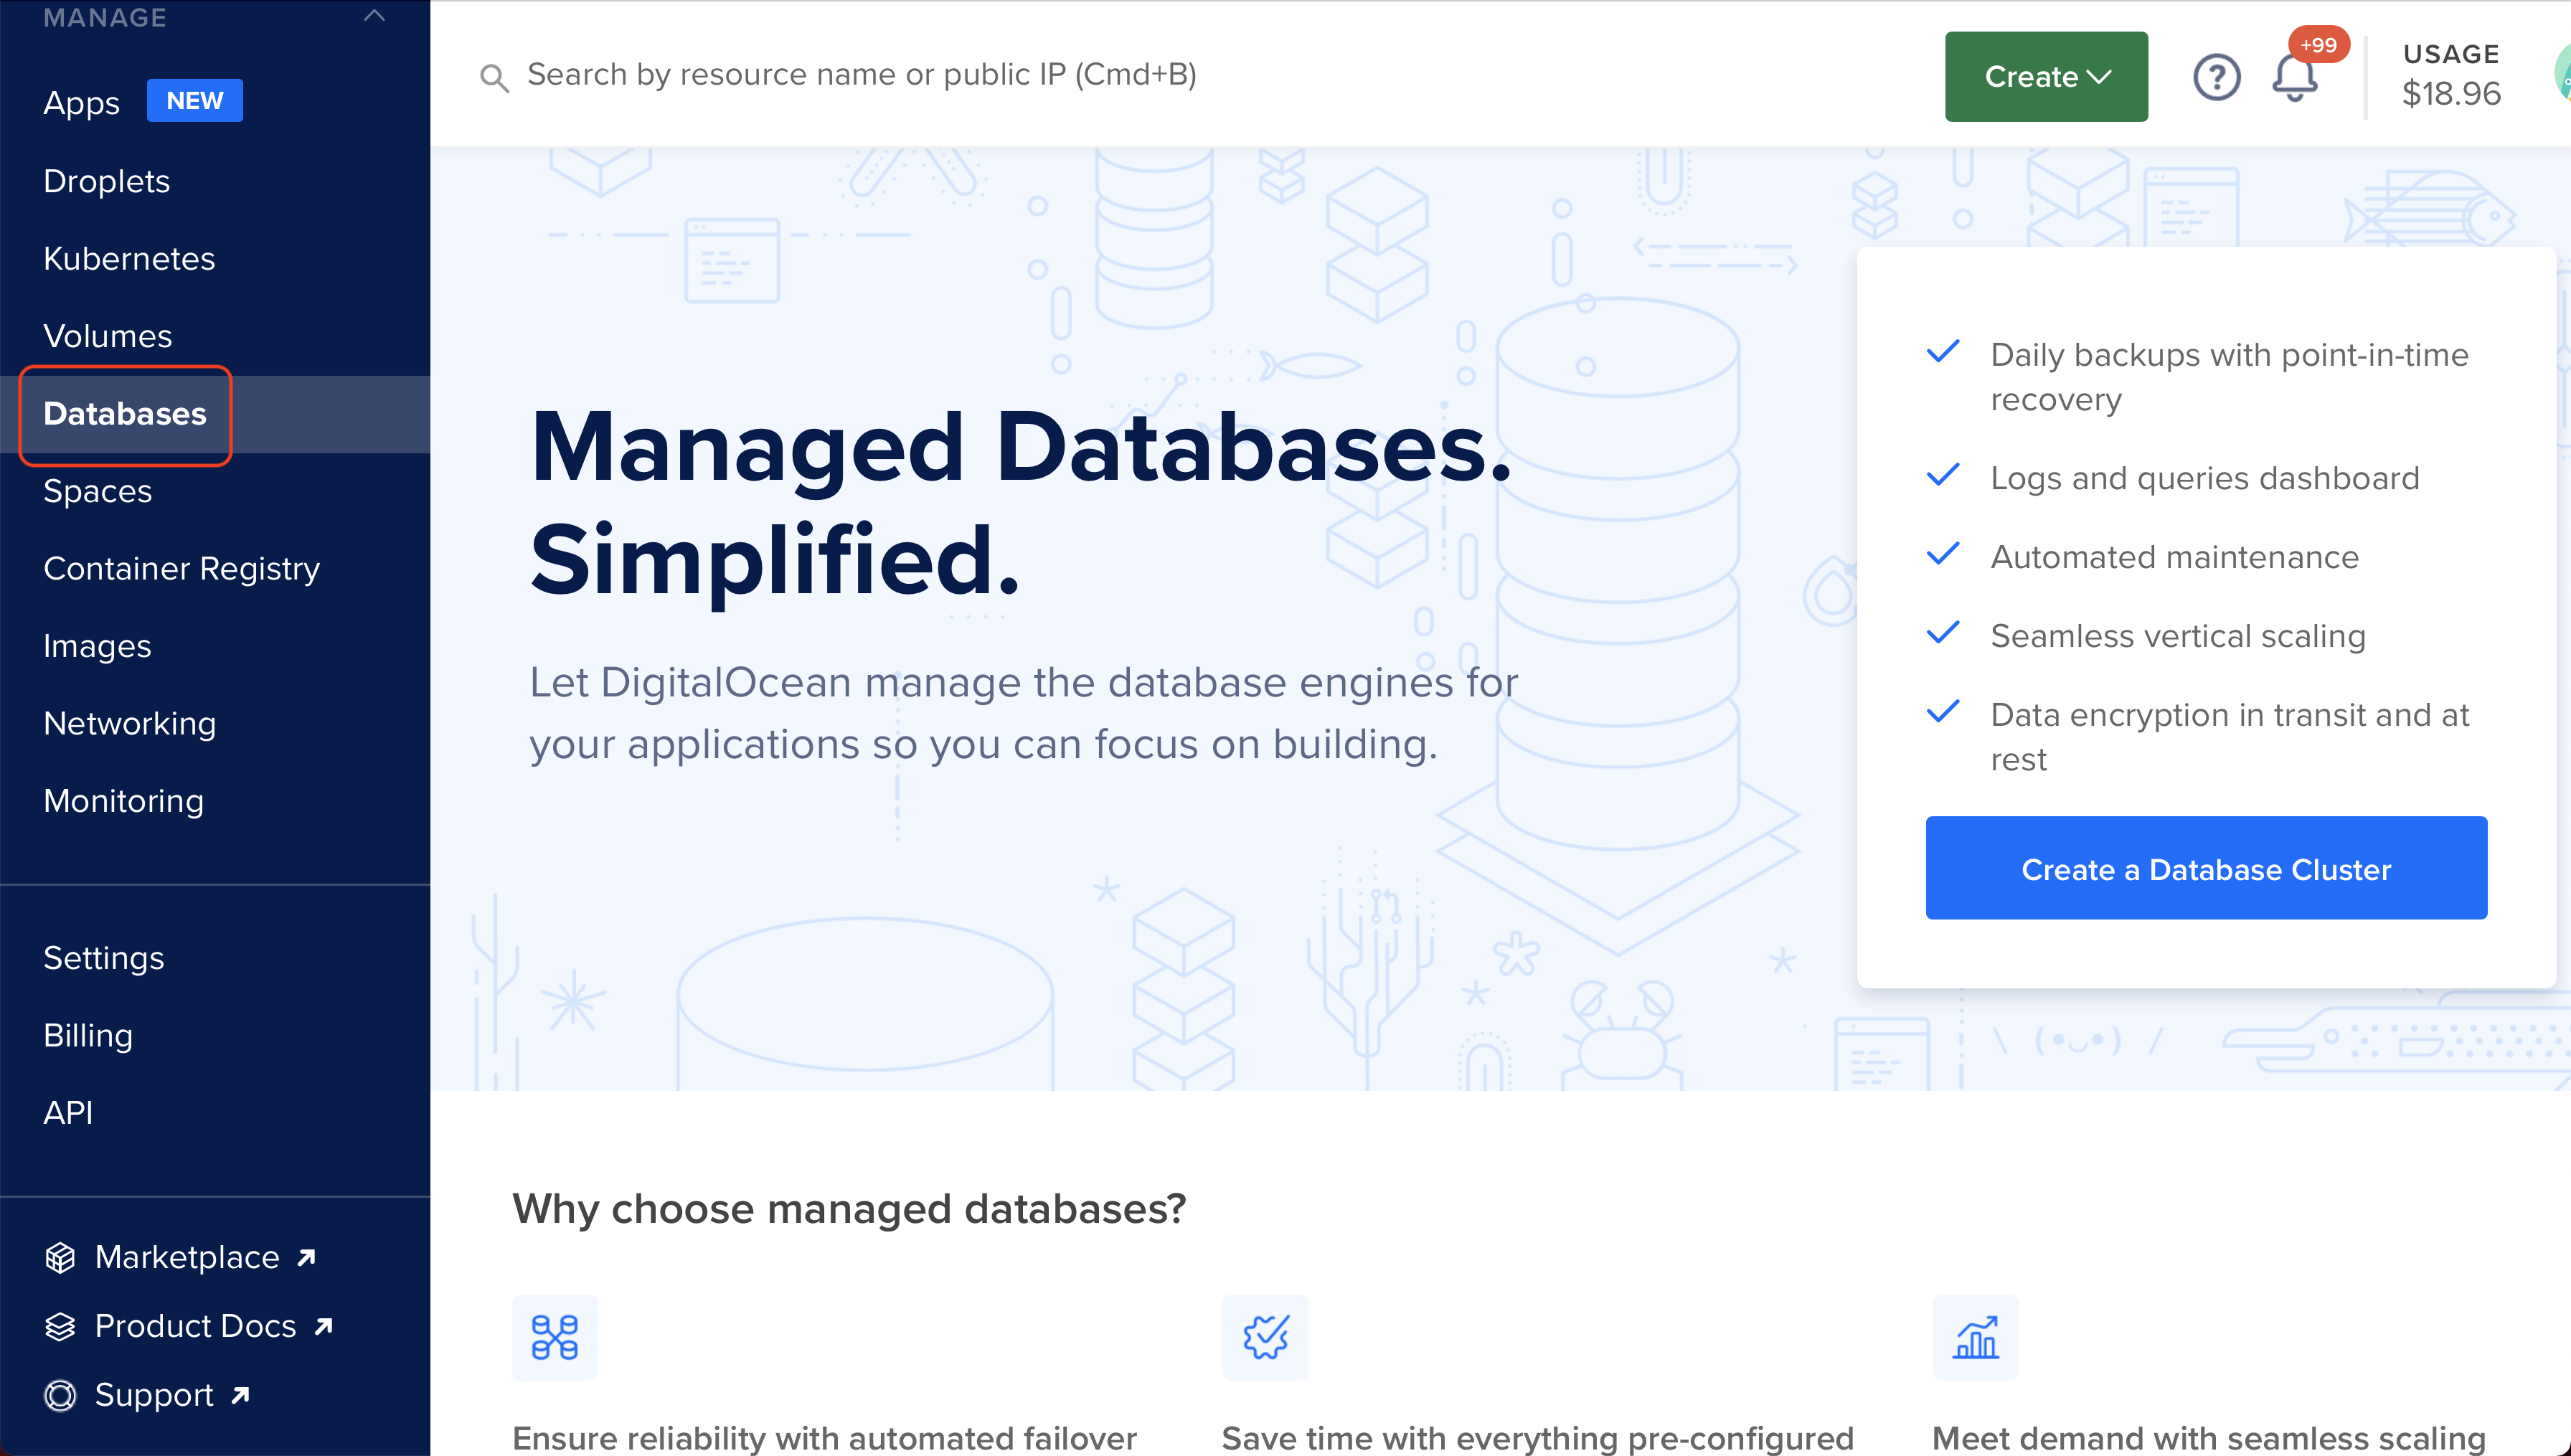
Go to DigitalOcean, and click on Databases > Create Database Cluster
Note
Sign up using our referral link to get $200 USD credit.
Choose the desired region and MongoDB as database engine.
Ideally, the region should be close to where your users are.
Next, choose the Basic - Shared CPU configuration ($12/mo plan), and leave the default storage size (15 GB). It is possible to change the configuration if more resources are needed later.
Click Create Database Cluster.
Once the database is up and running, click Users & Databases.
Add a new user and a new database.

Setup API
Navigate to App Platform.
Choose GitHub and click Create app.
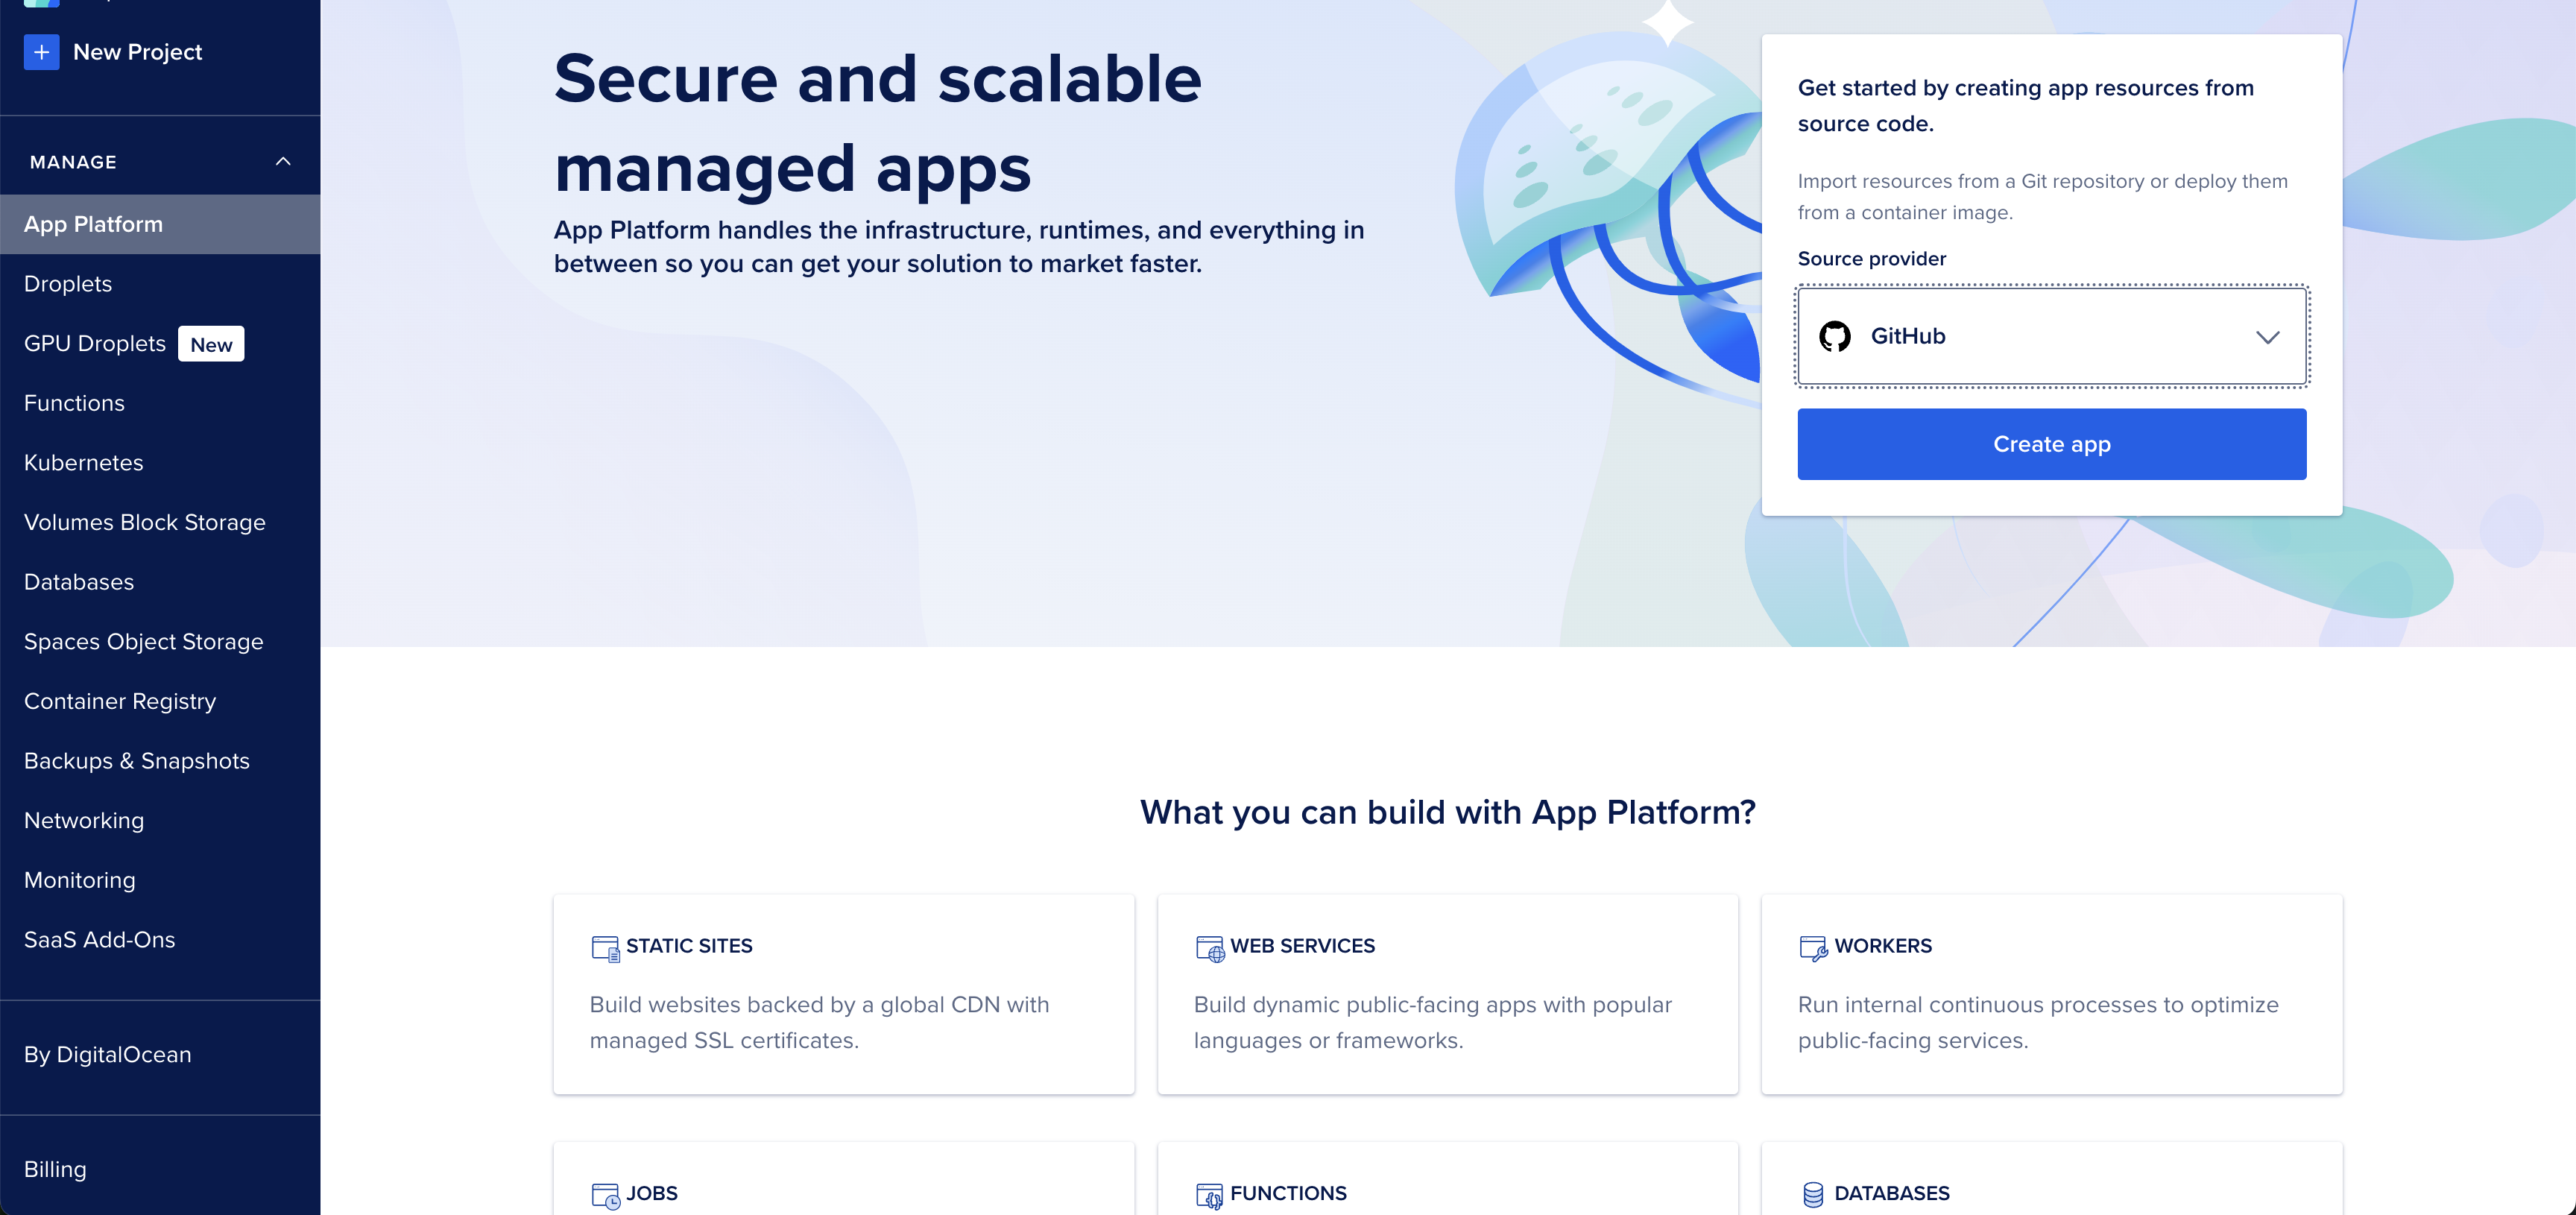
Select your api repo. Leave the other fields with its default values.
Click Next.
Under Resources, delete the second entry. Only 1 resource is needed to deploy the API service.
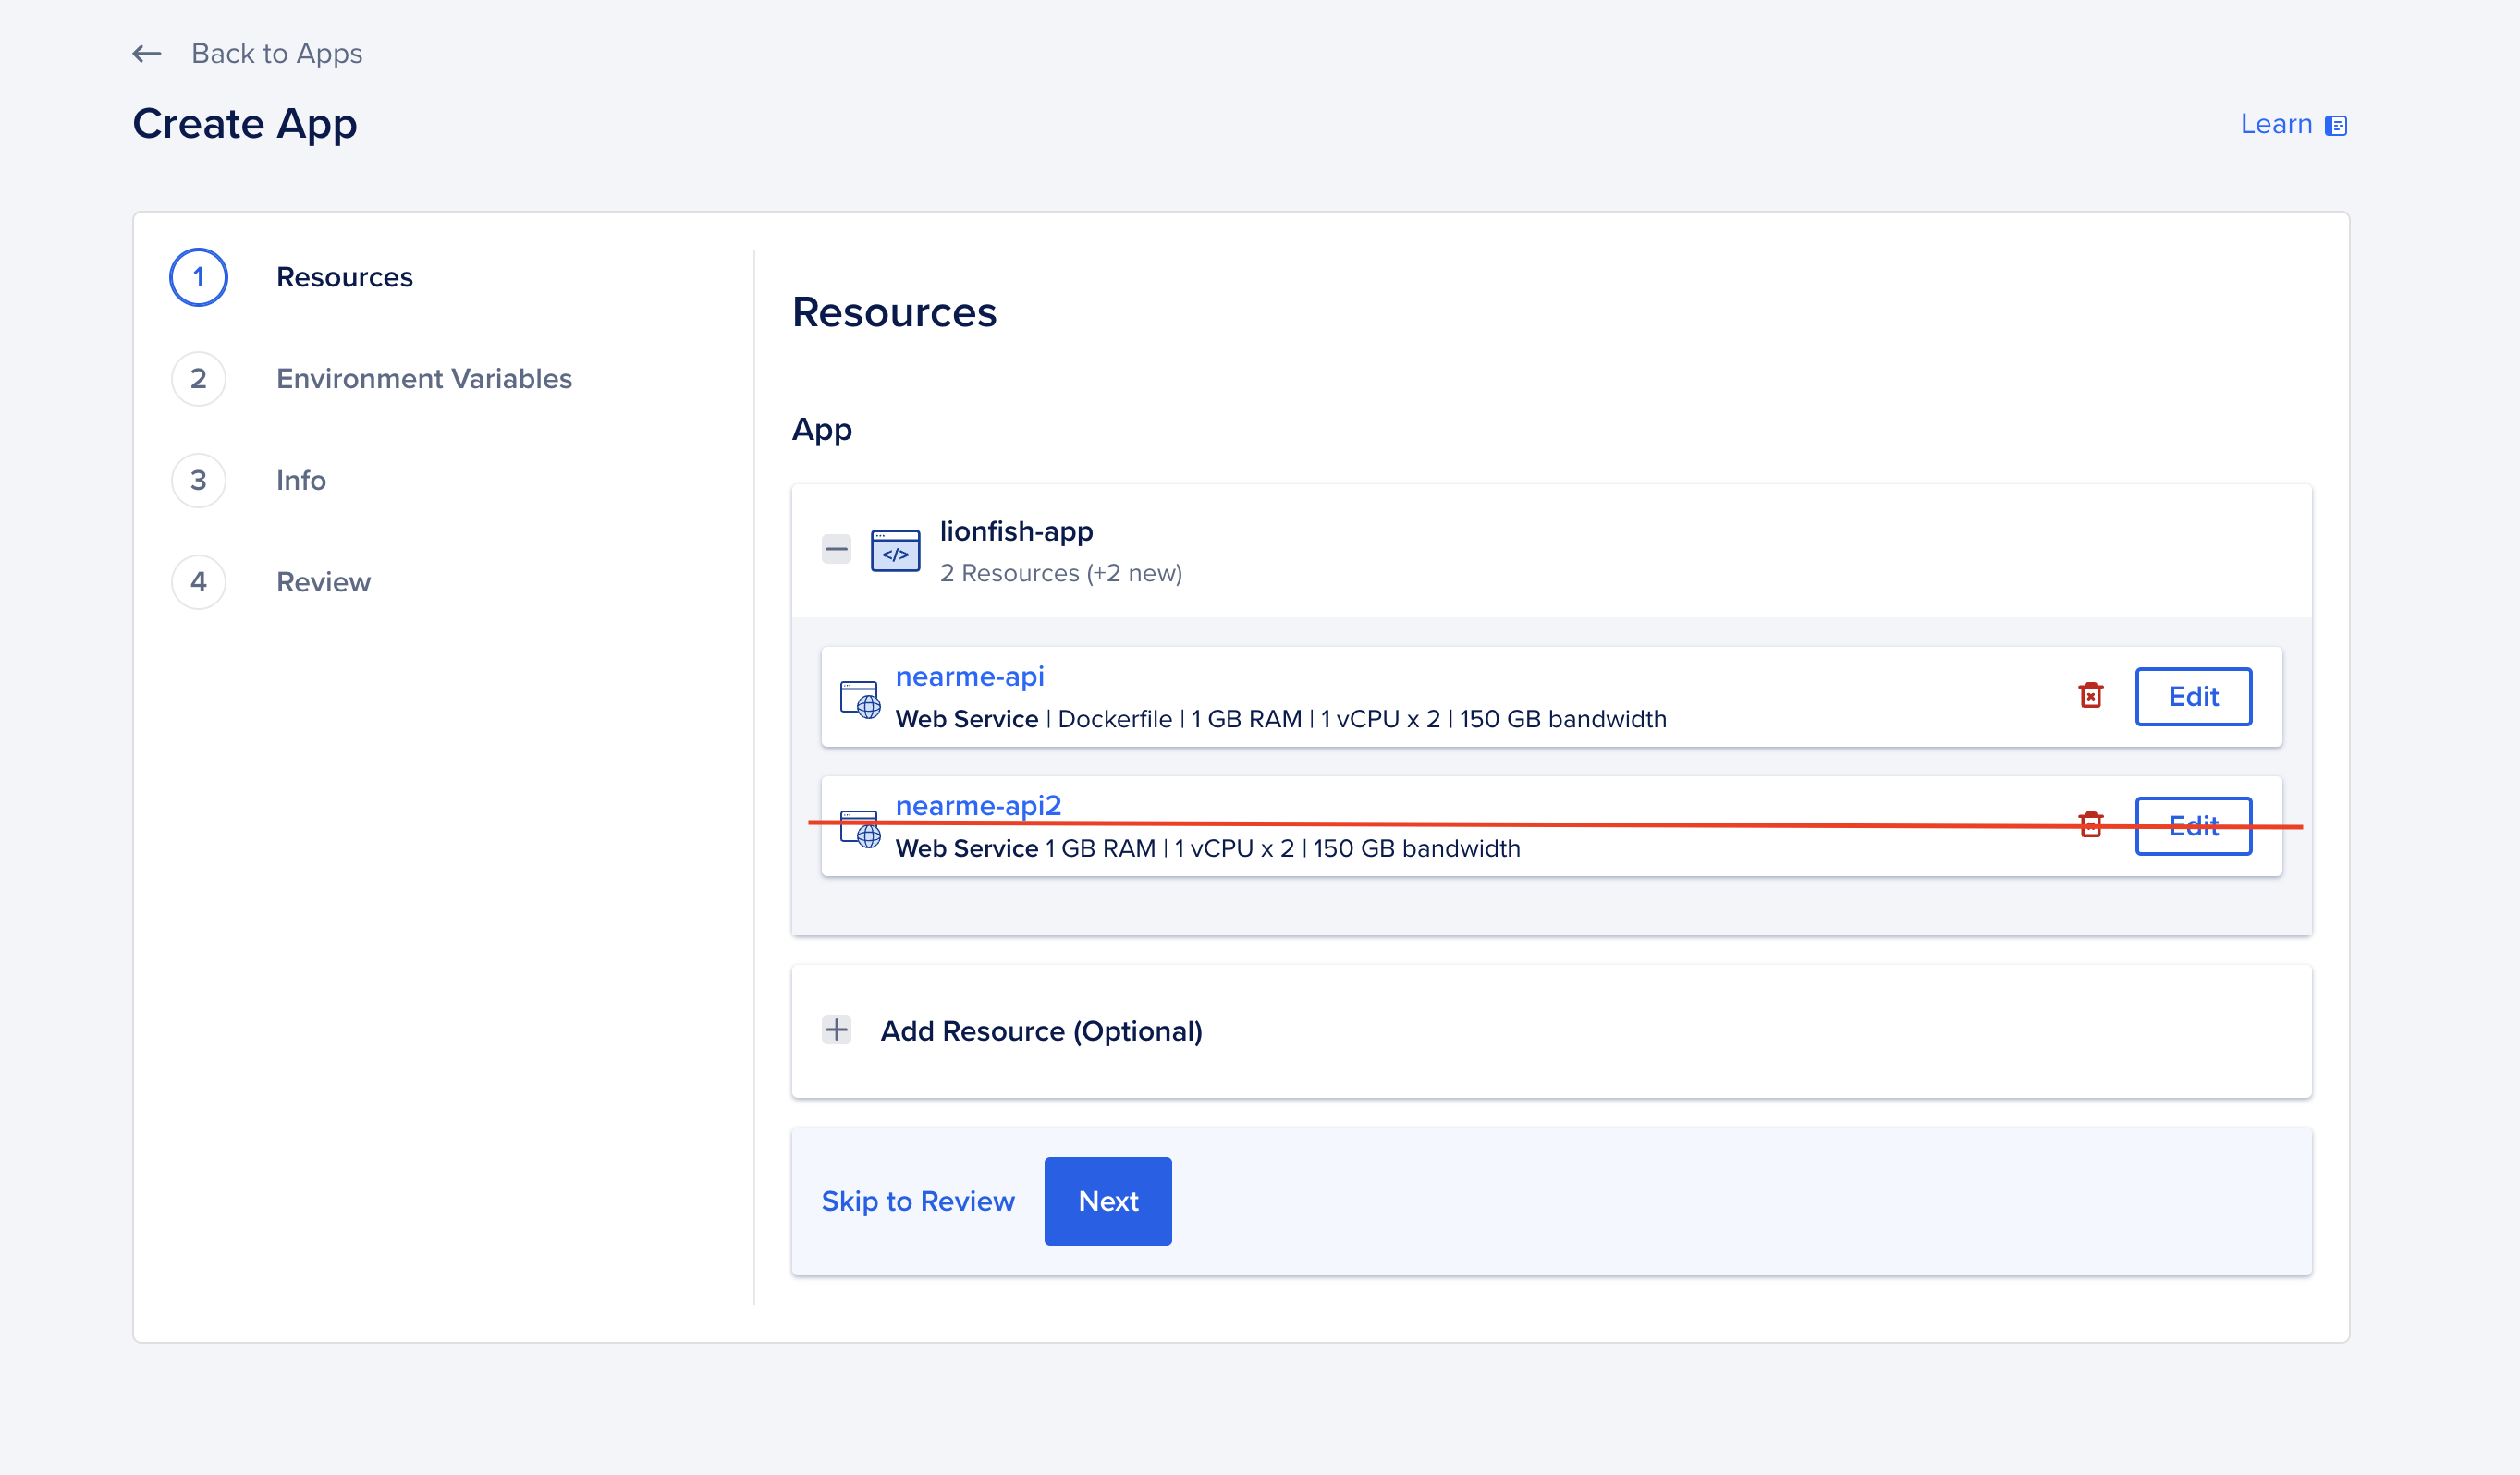
Click Add Resource (Optional) > Database > Add.
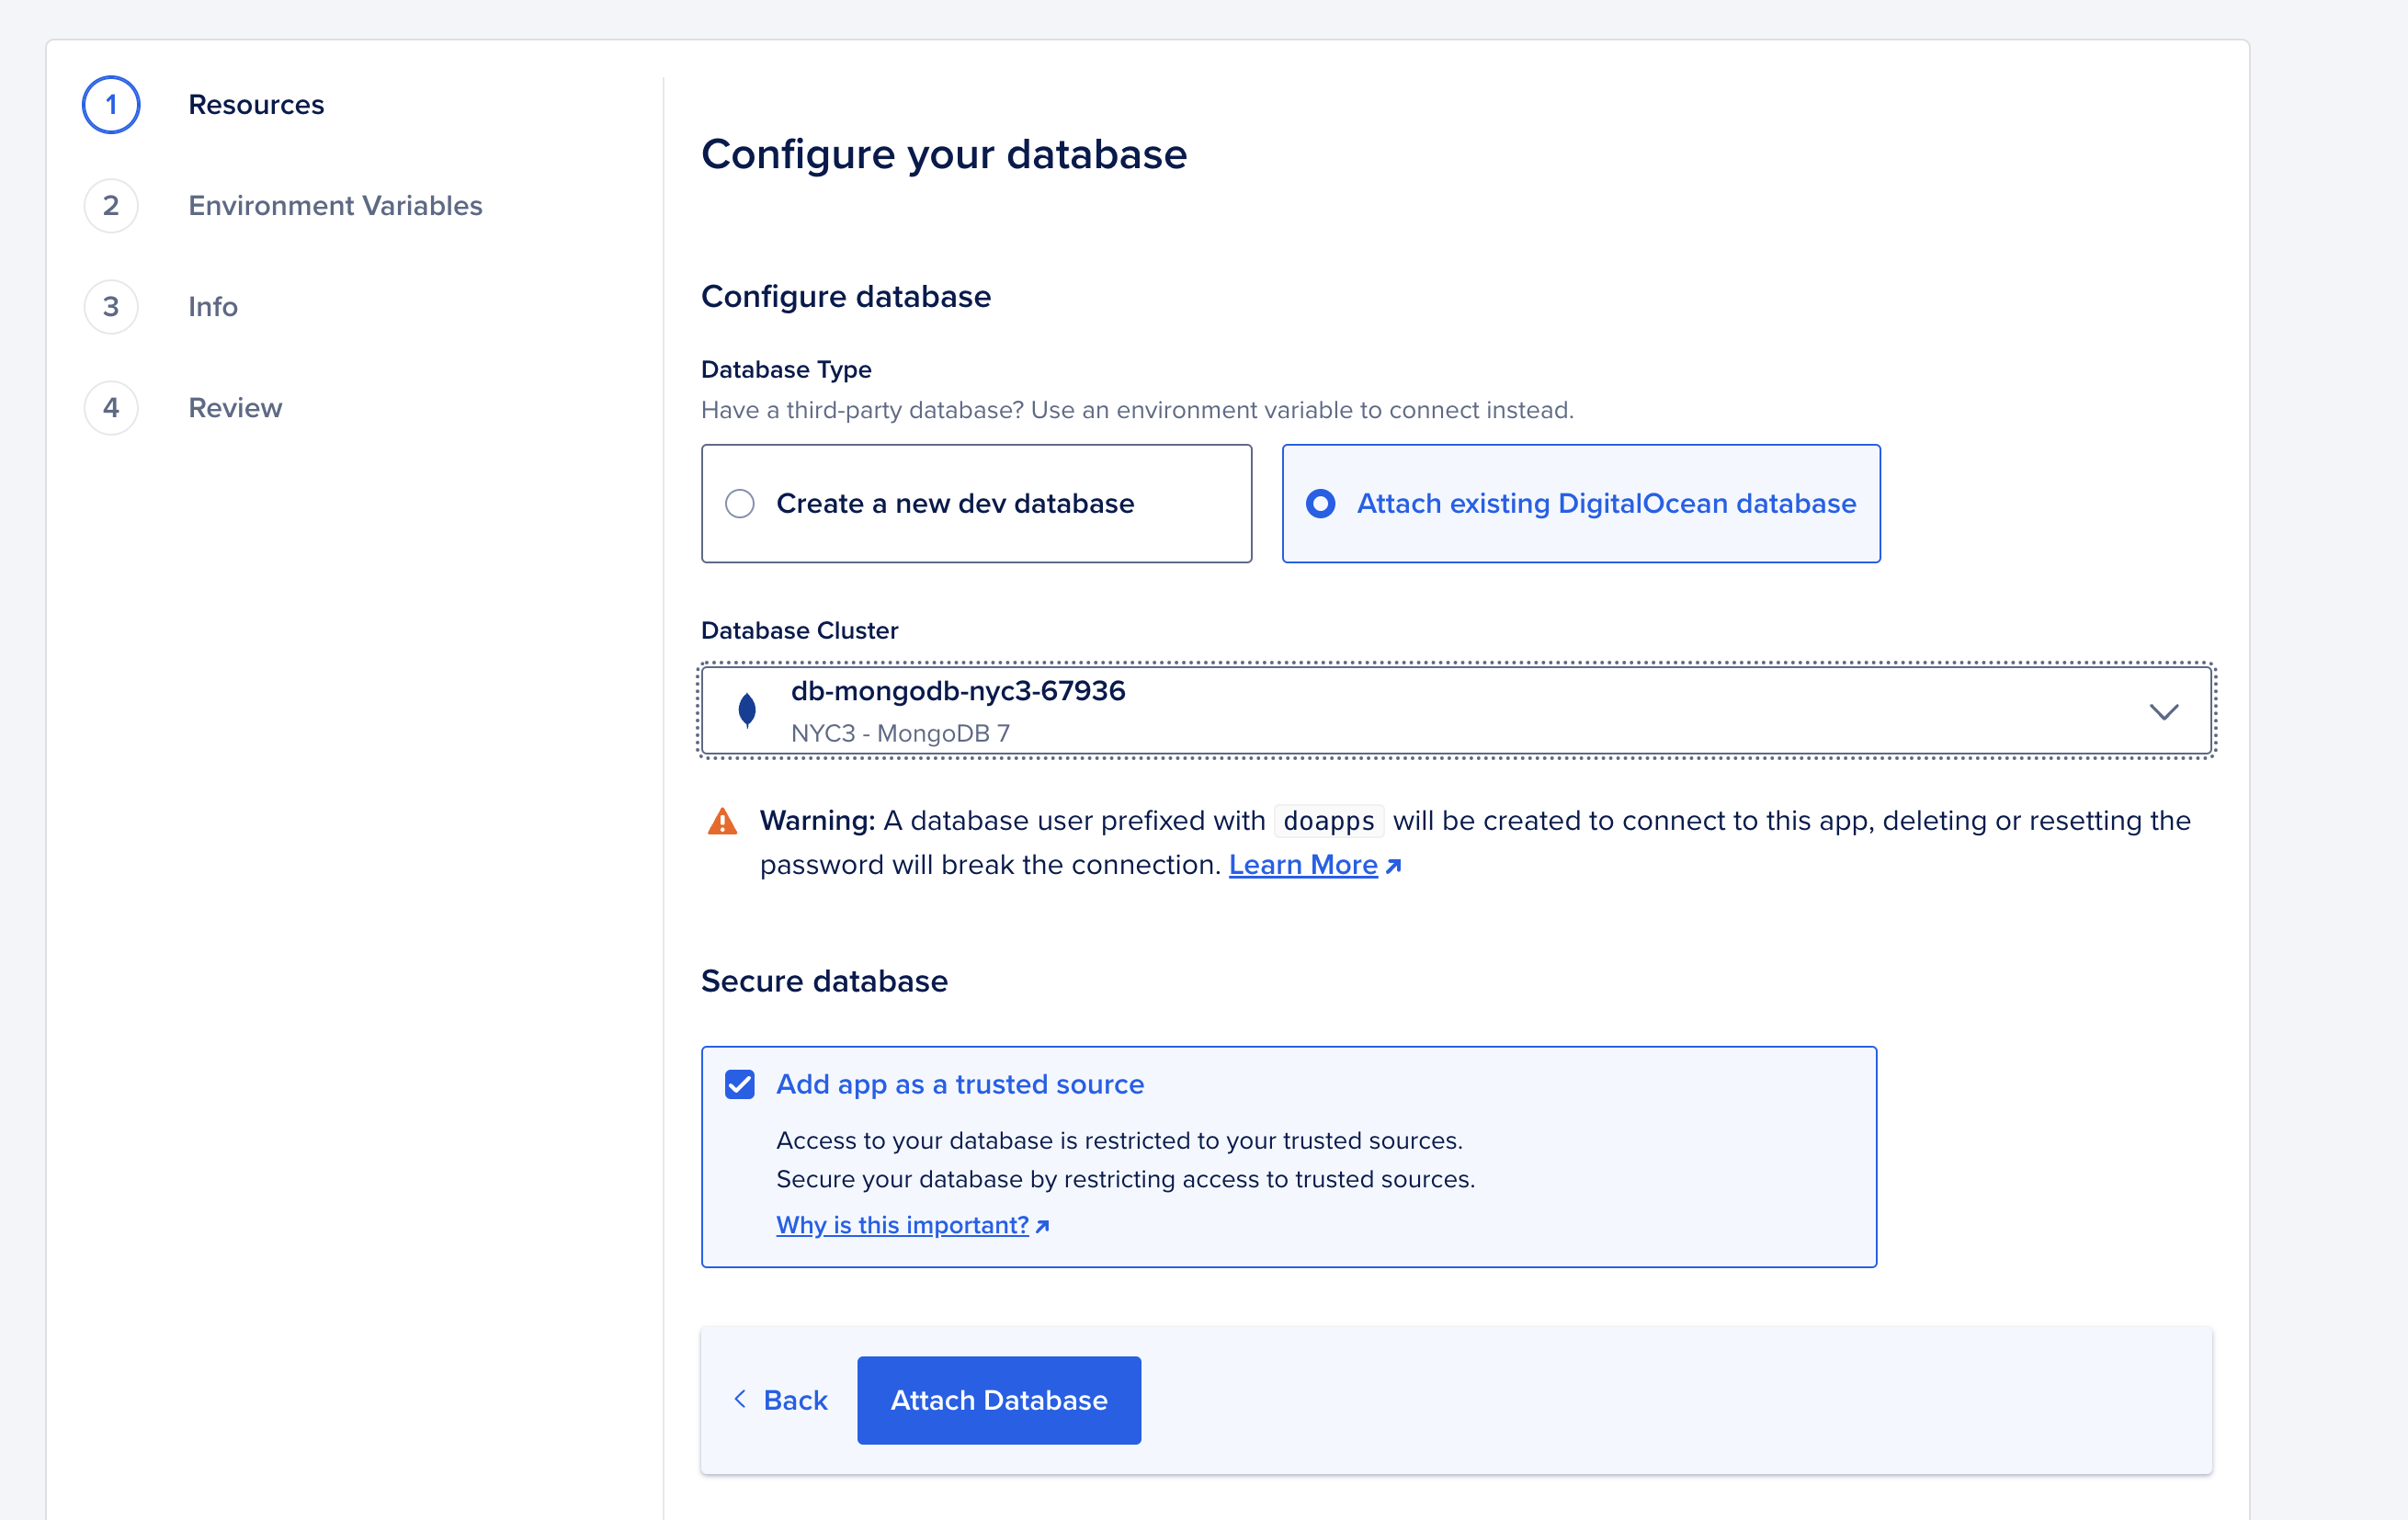
Next, select Attach existing DigitalOcean database, and select the database cluster previously created.
Click Attach database.
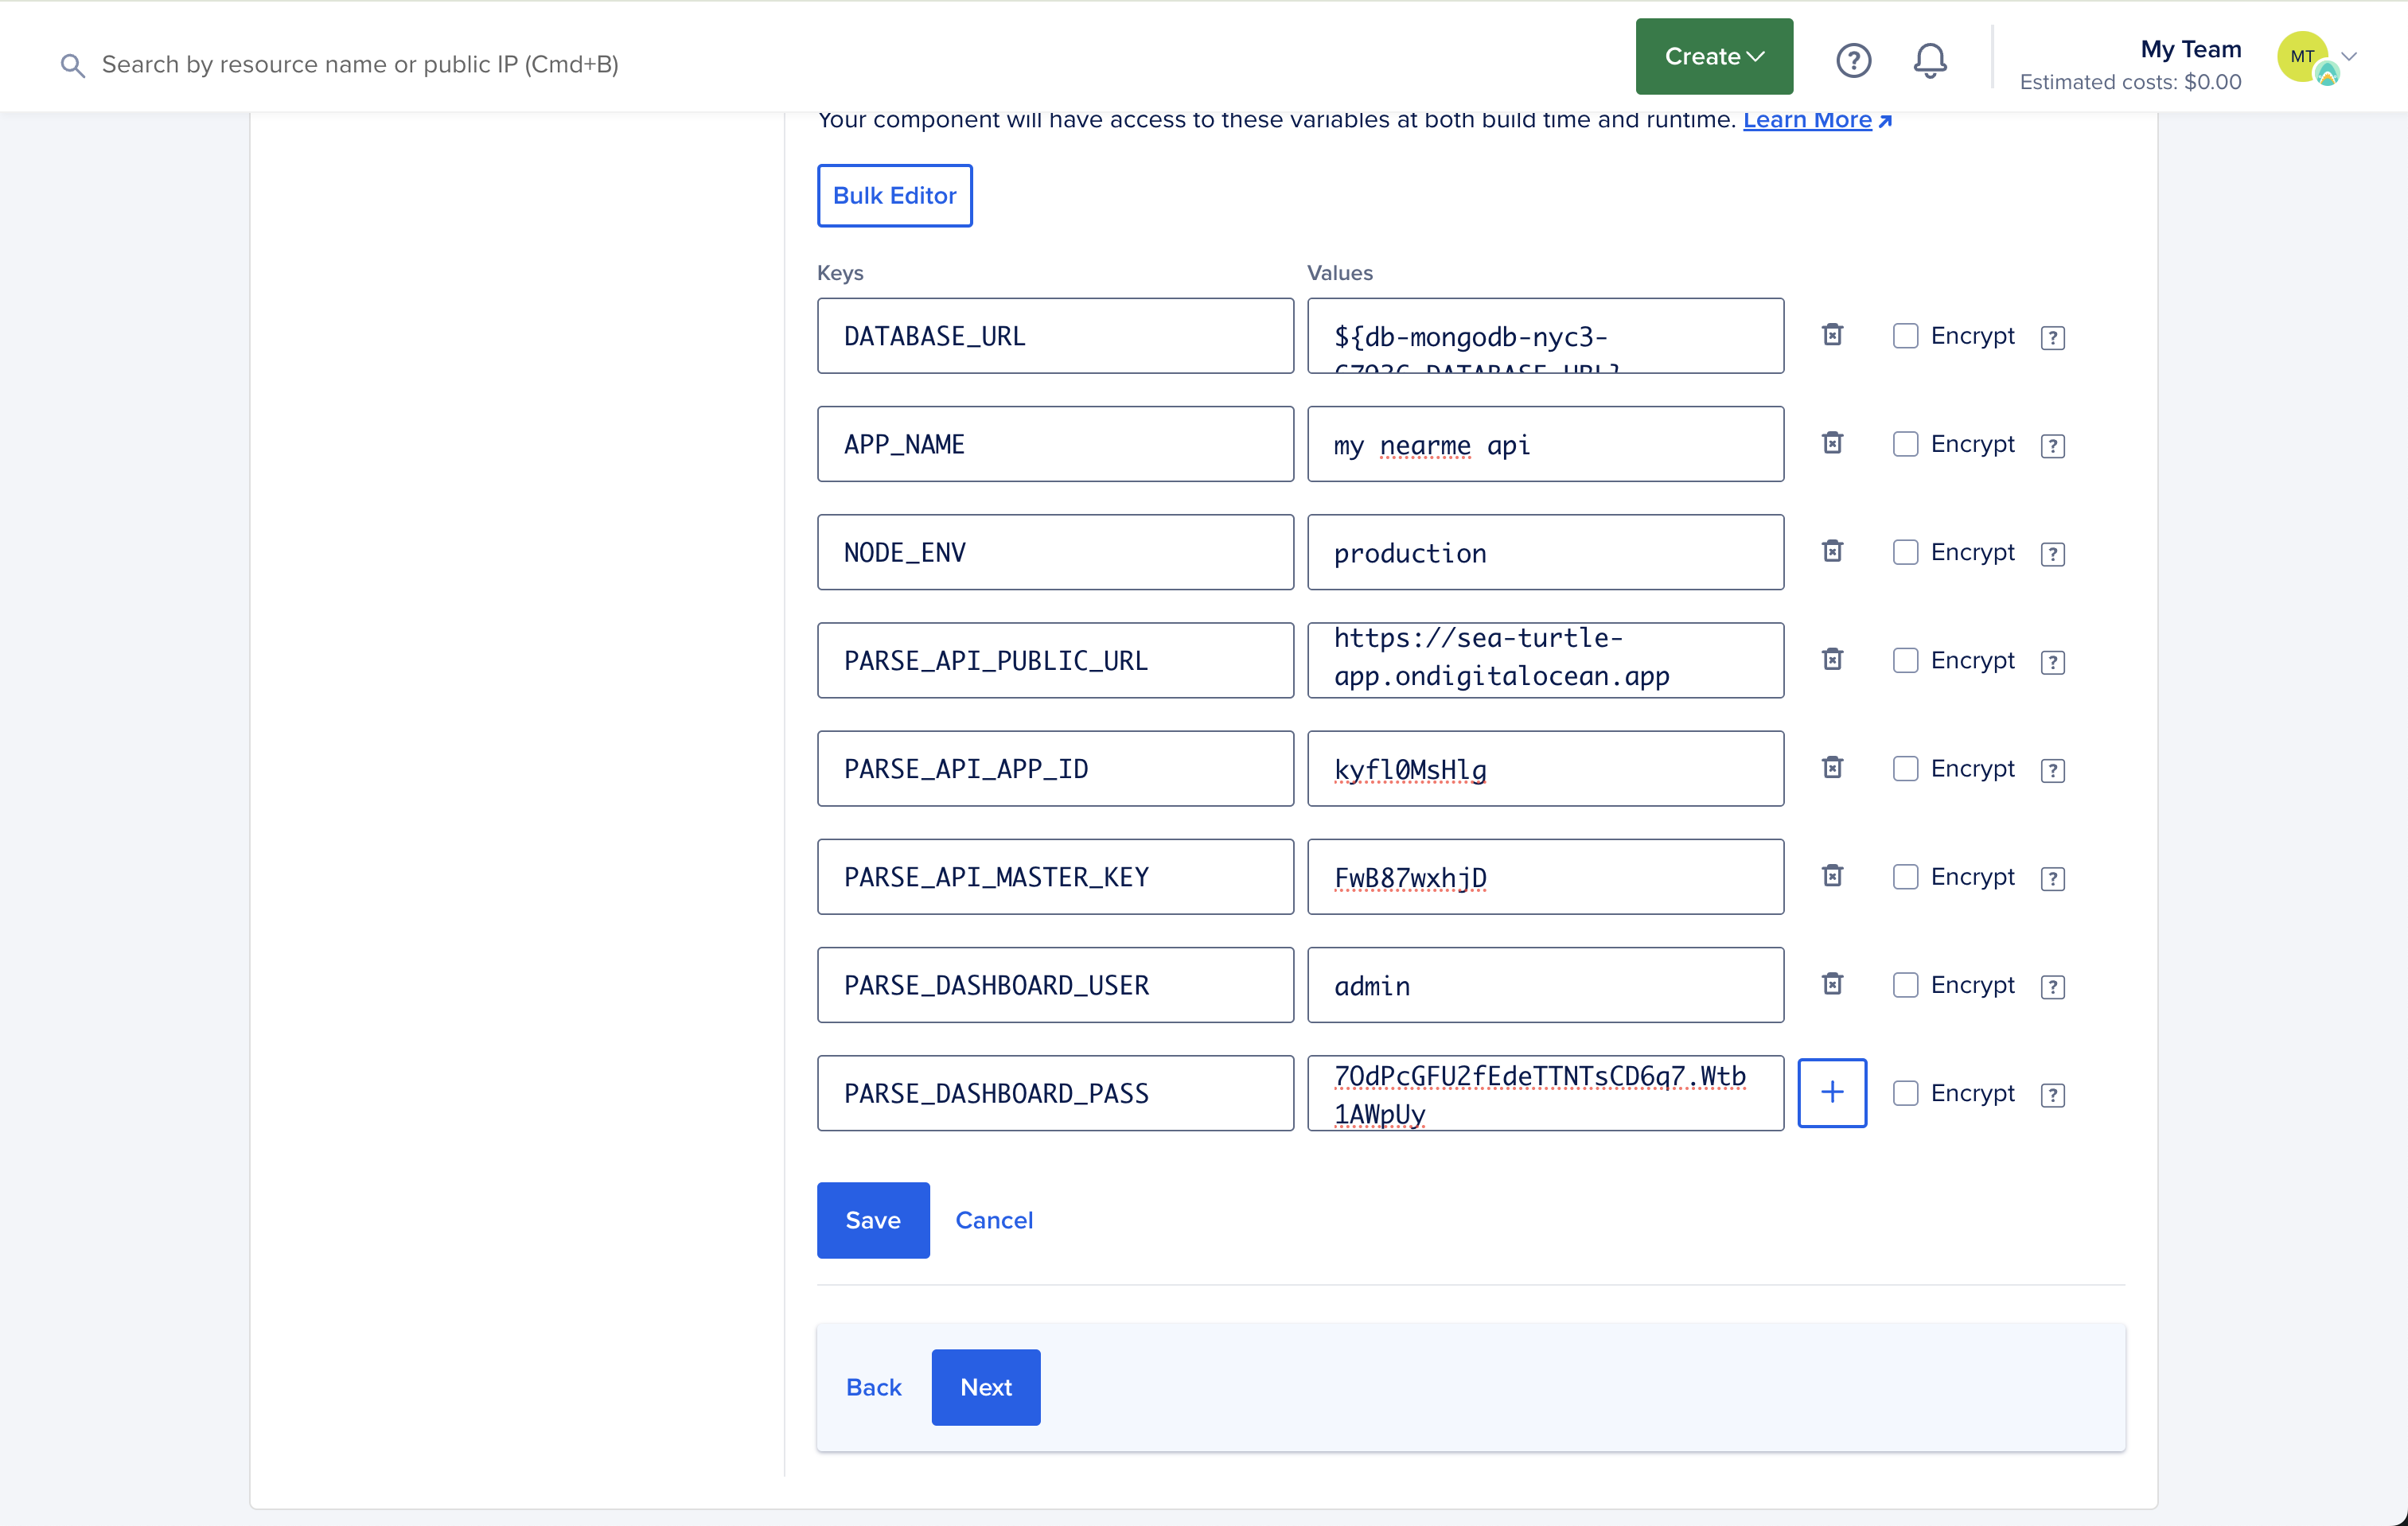
Under Environment variables, click Edit on the app entry.

Since the database was attached, the DATABASE_URL should be already added.
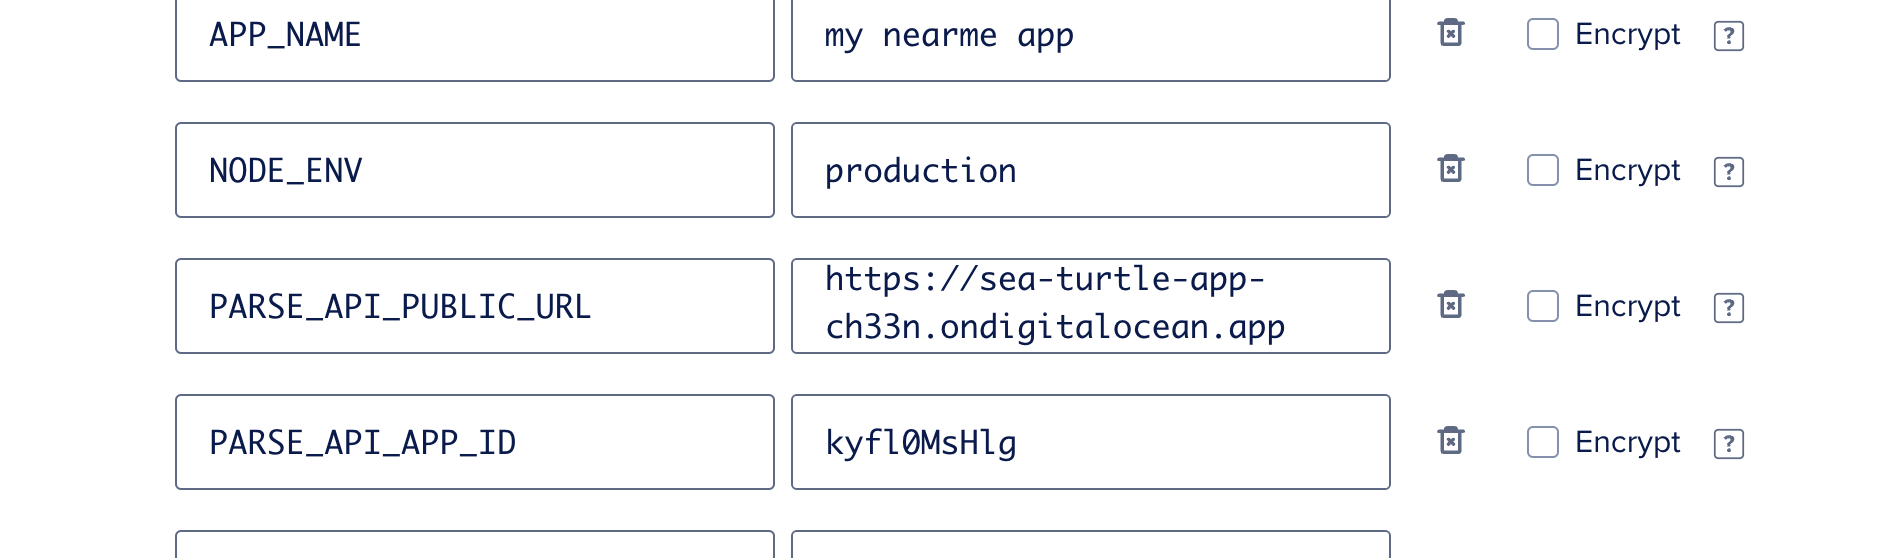
The following variables are required:
APP_NAMENODE_ENVPARSE_API_PUBLIC_URLPARSE_API_APP_IDPARSE_API_MASTER_KEYPARSE_DASHBOARD_USERPARSE_DASHBOARD_PASS
See here to learn how to encrypt PARSE_DASHBOARD_PASS.
Go to random.org to generate:
PARSE_API_APP_IDPARSE_API_MASTER_KEY,
PARSE_API_PUBLIC_URL must be configured after the first app deployment. For now, use the app name assigned by DigitalOcean (e.g.: https://appname.ondigitalocean.app)
Click Save and Next.
Under Review, click Create Resources.
It will take several minutes to build the dependencies and deploy the code.
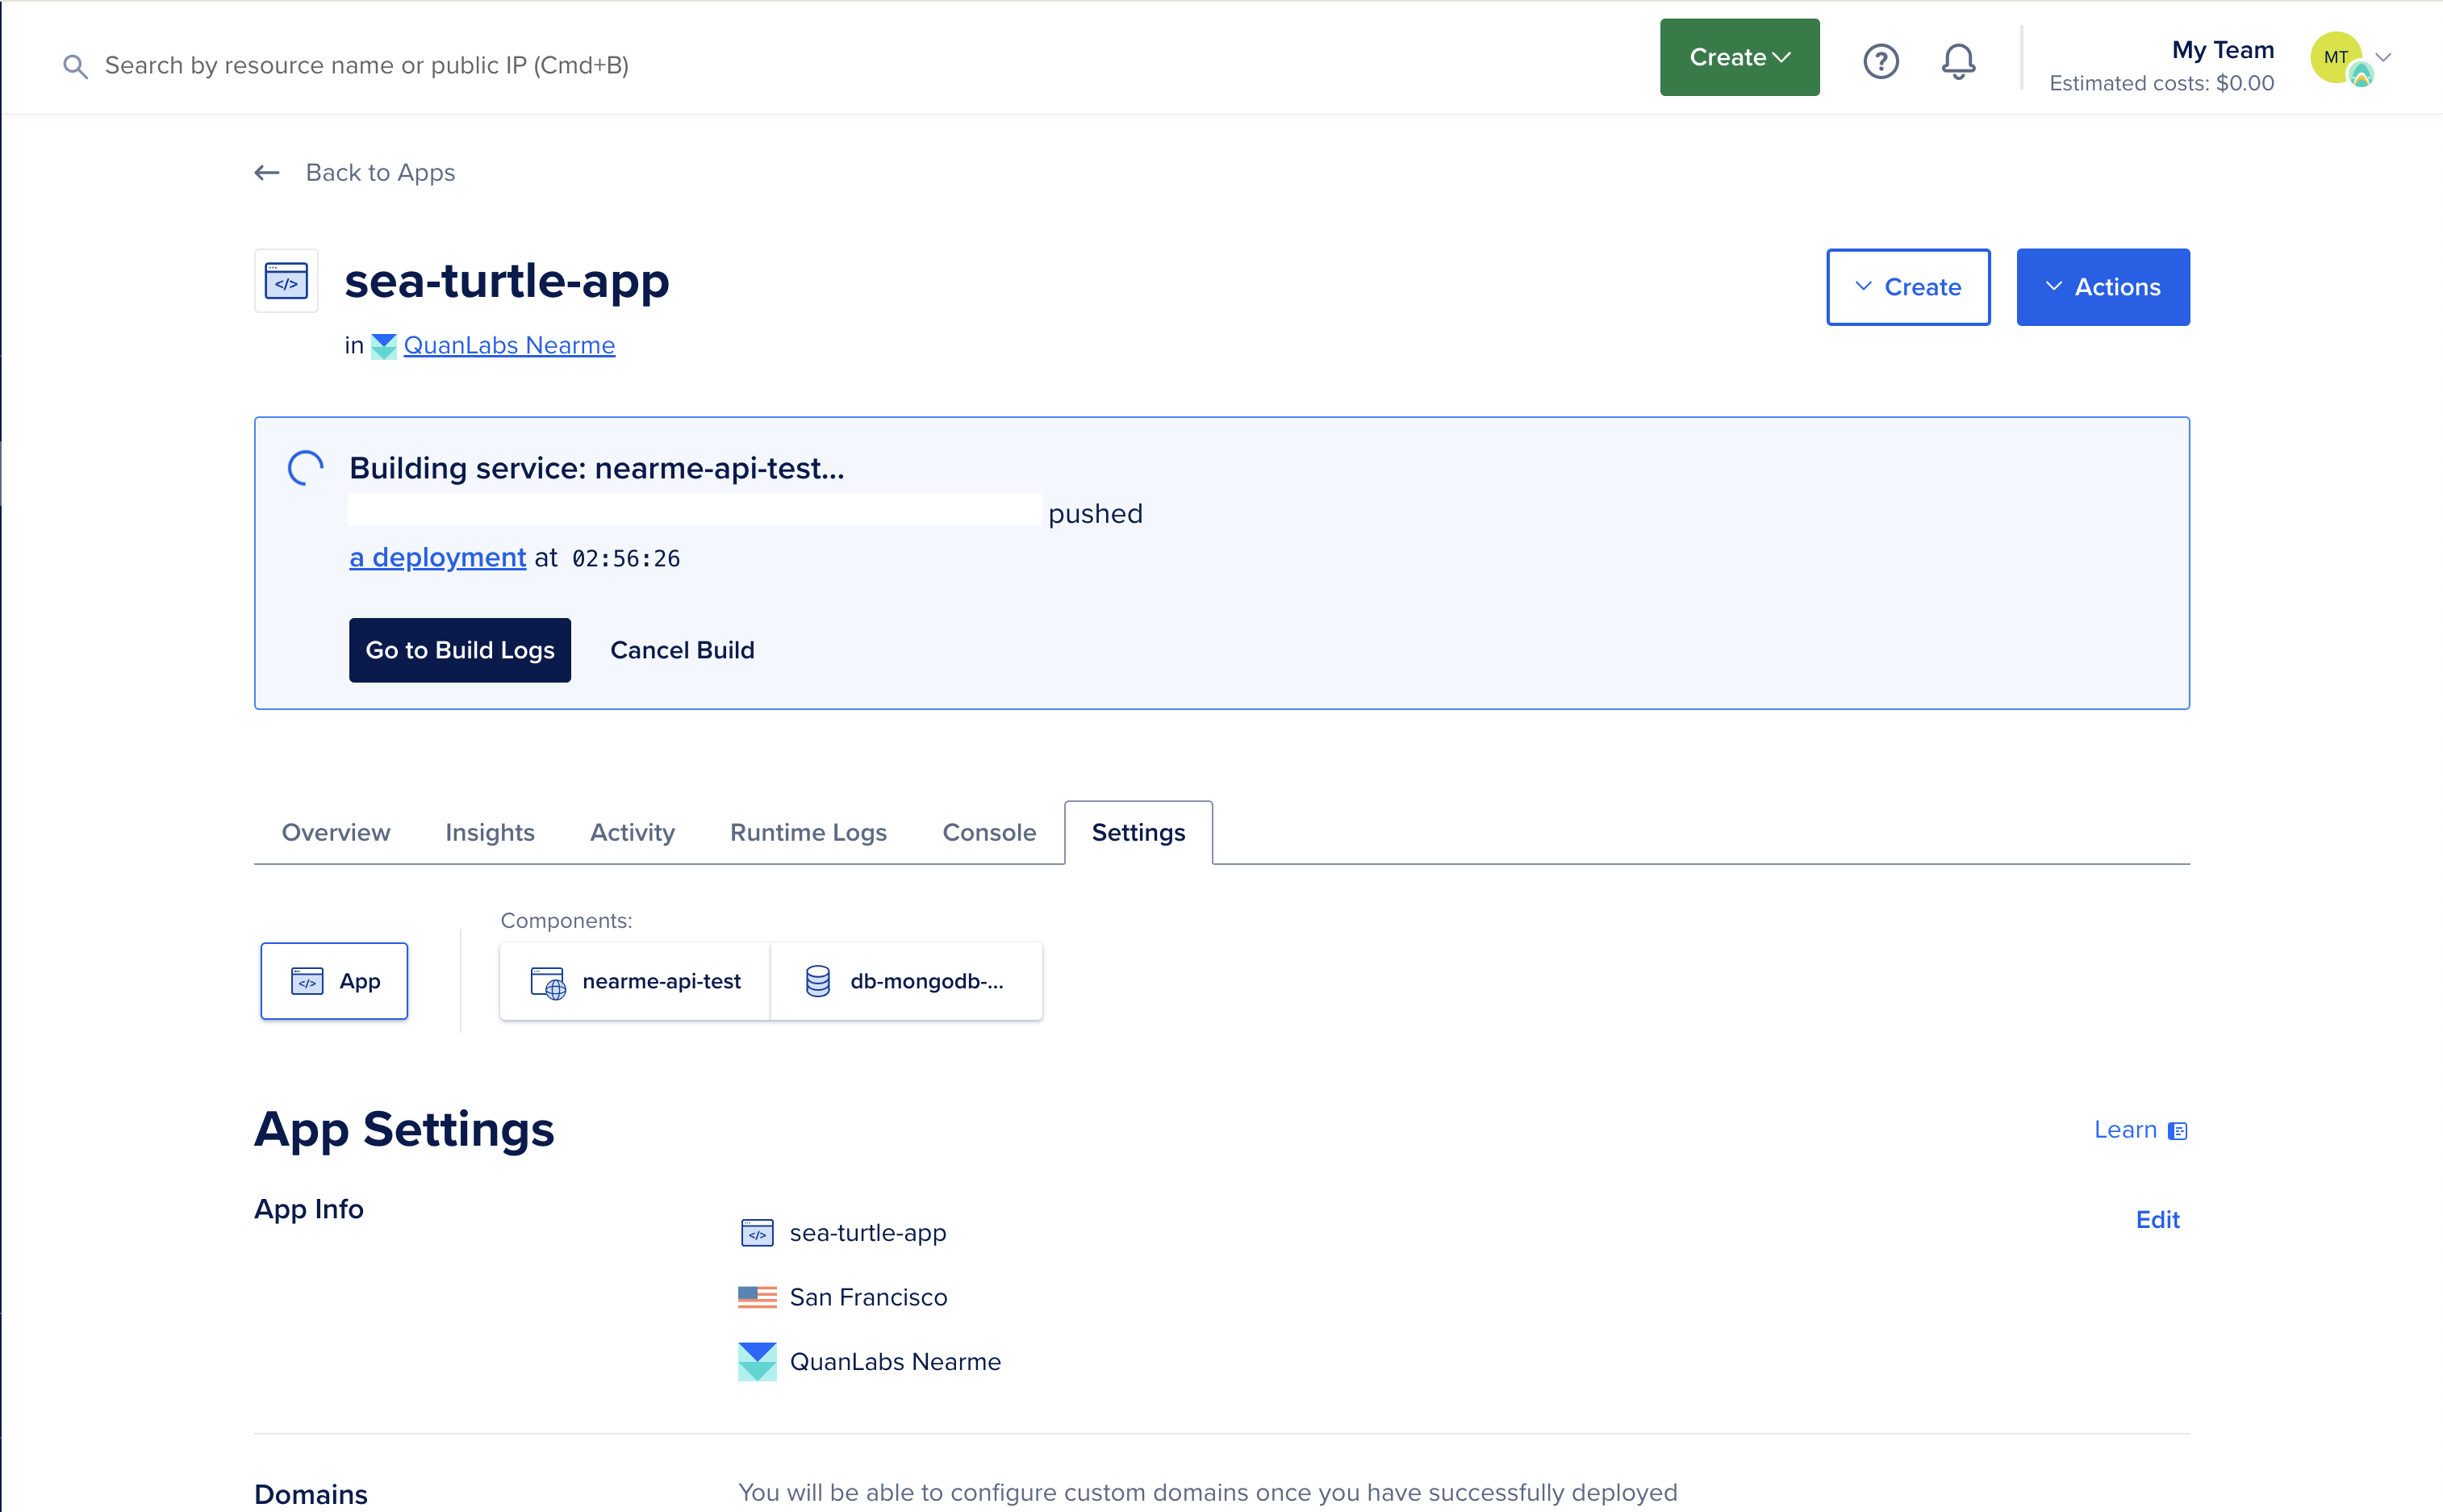
Once it’s done, the page should output a success message with the app domain.
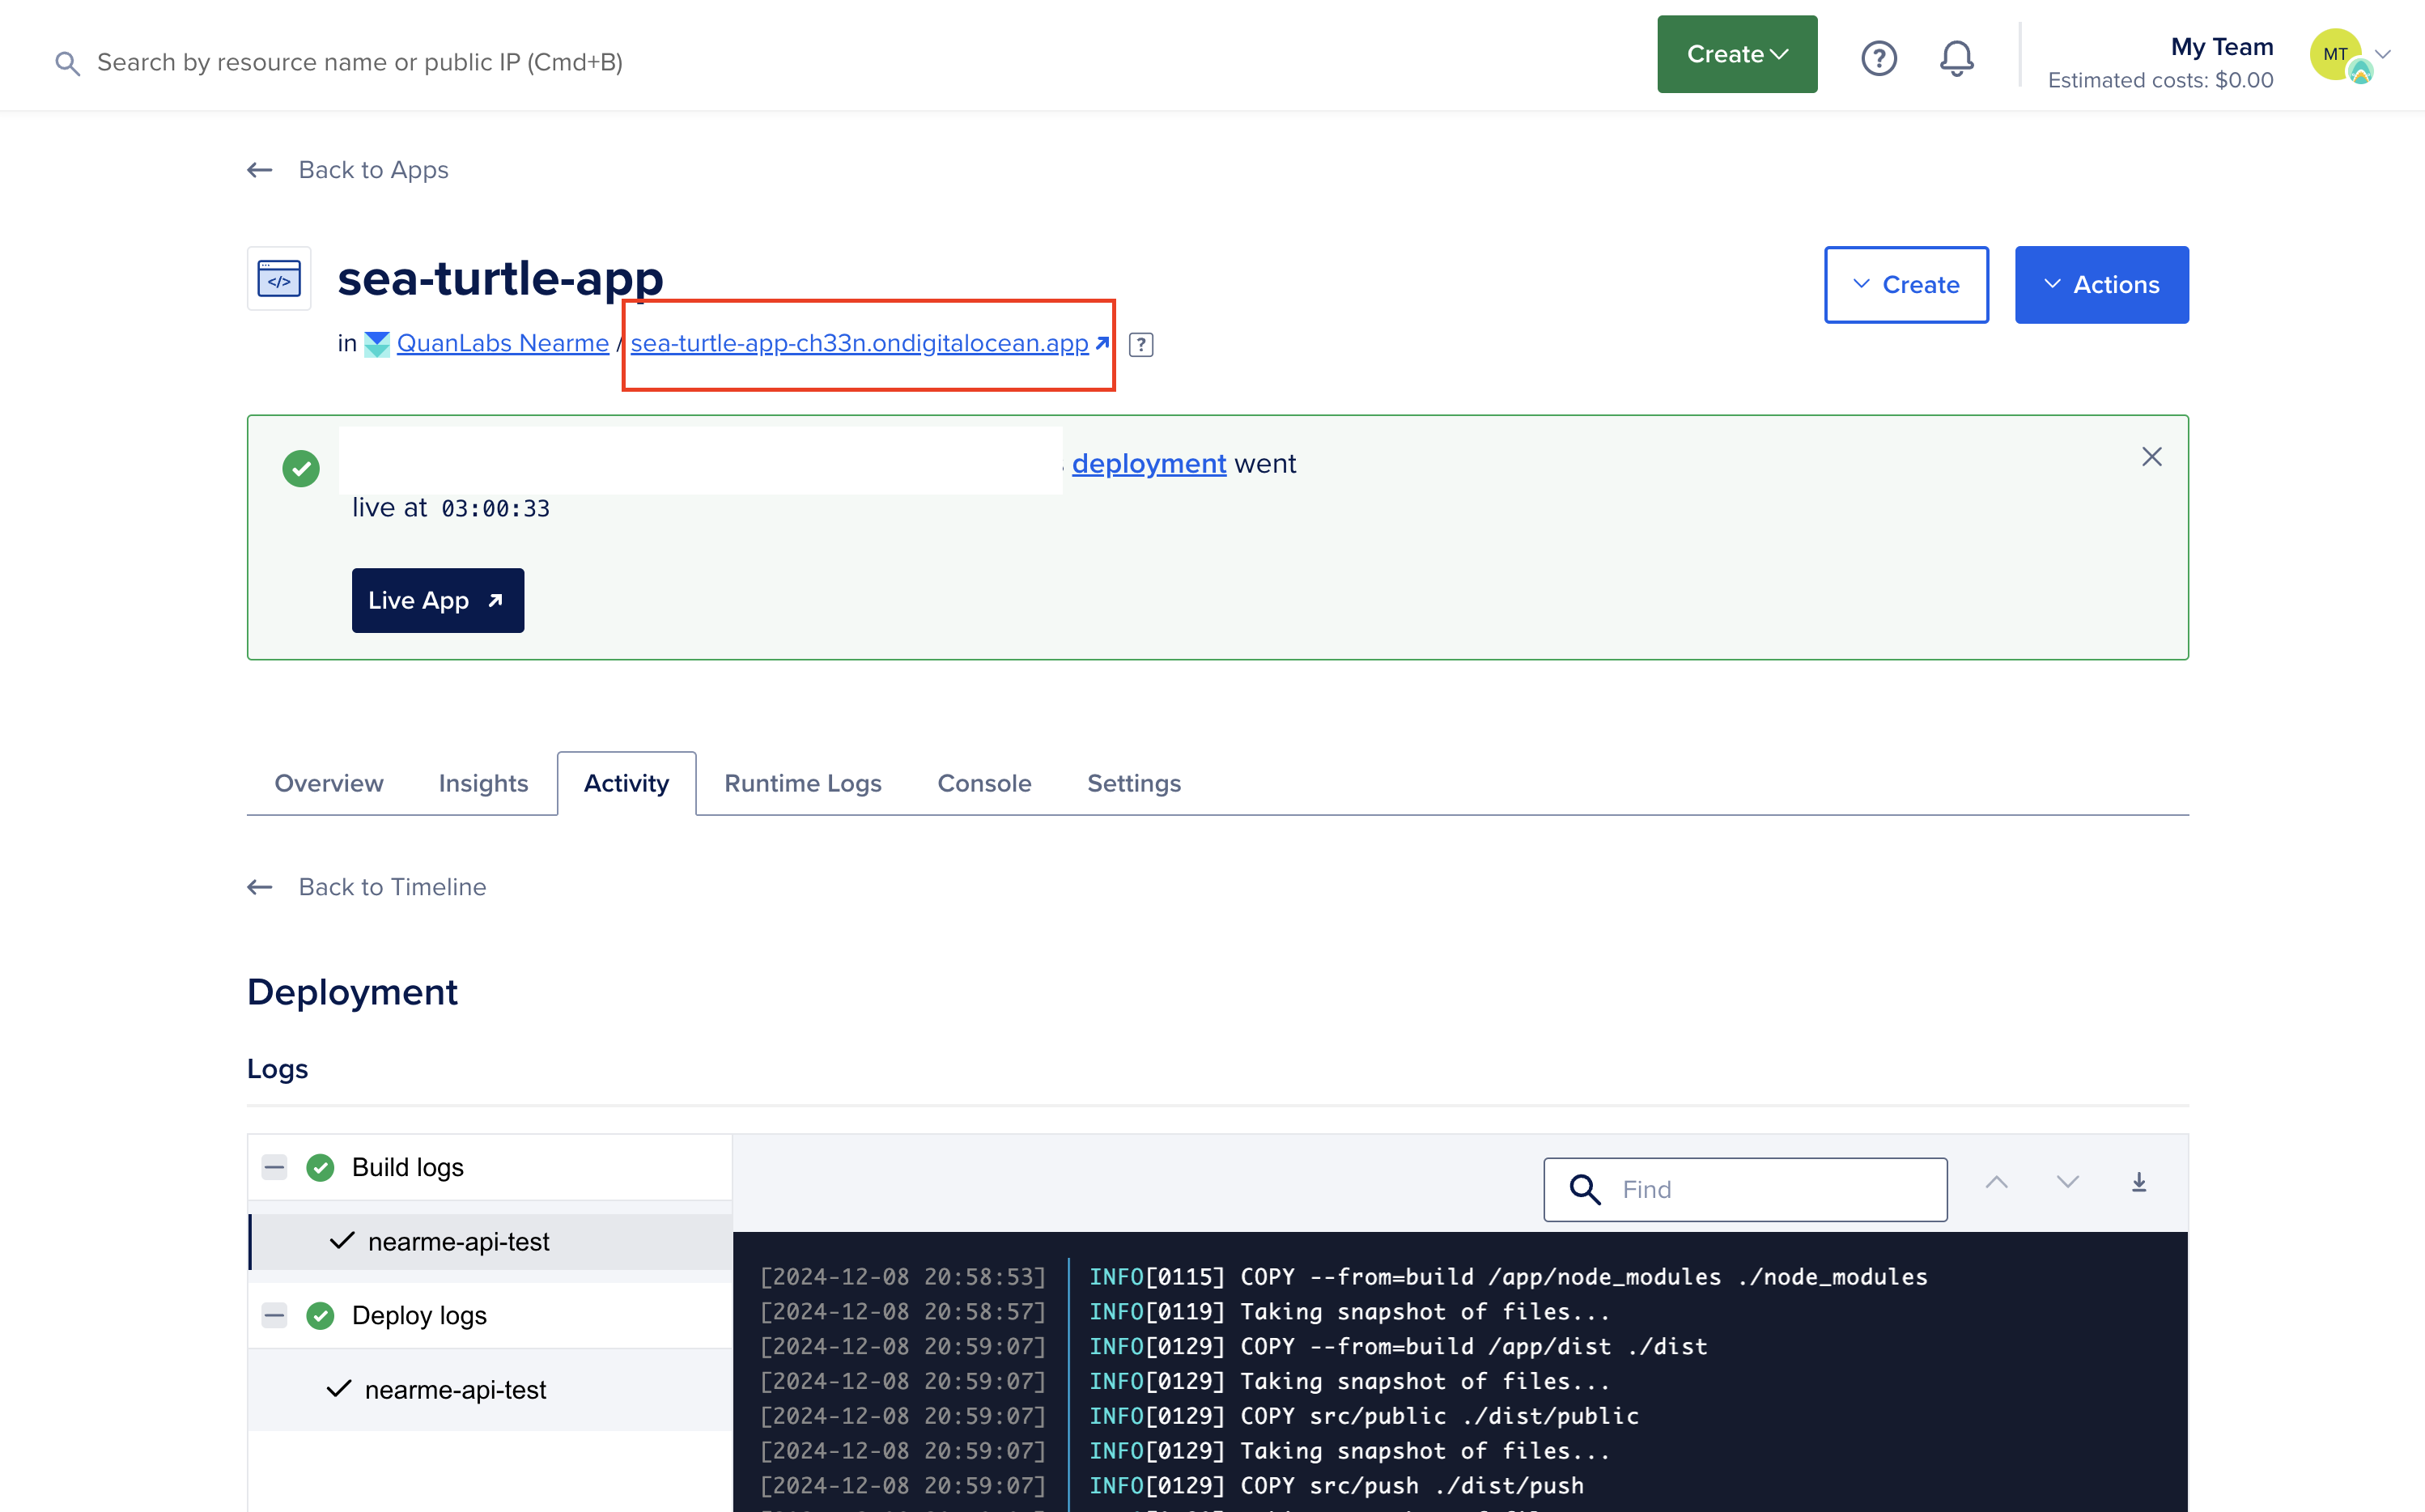
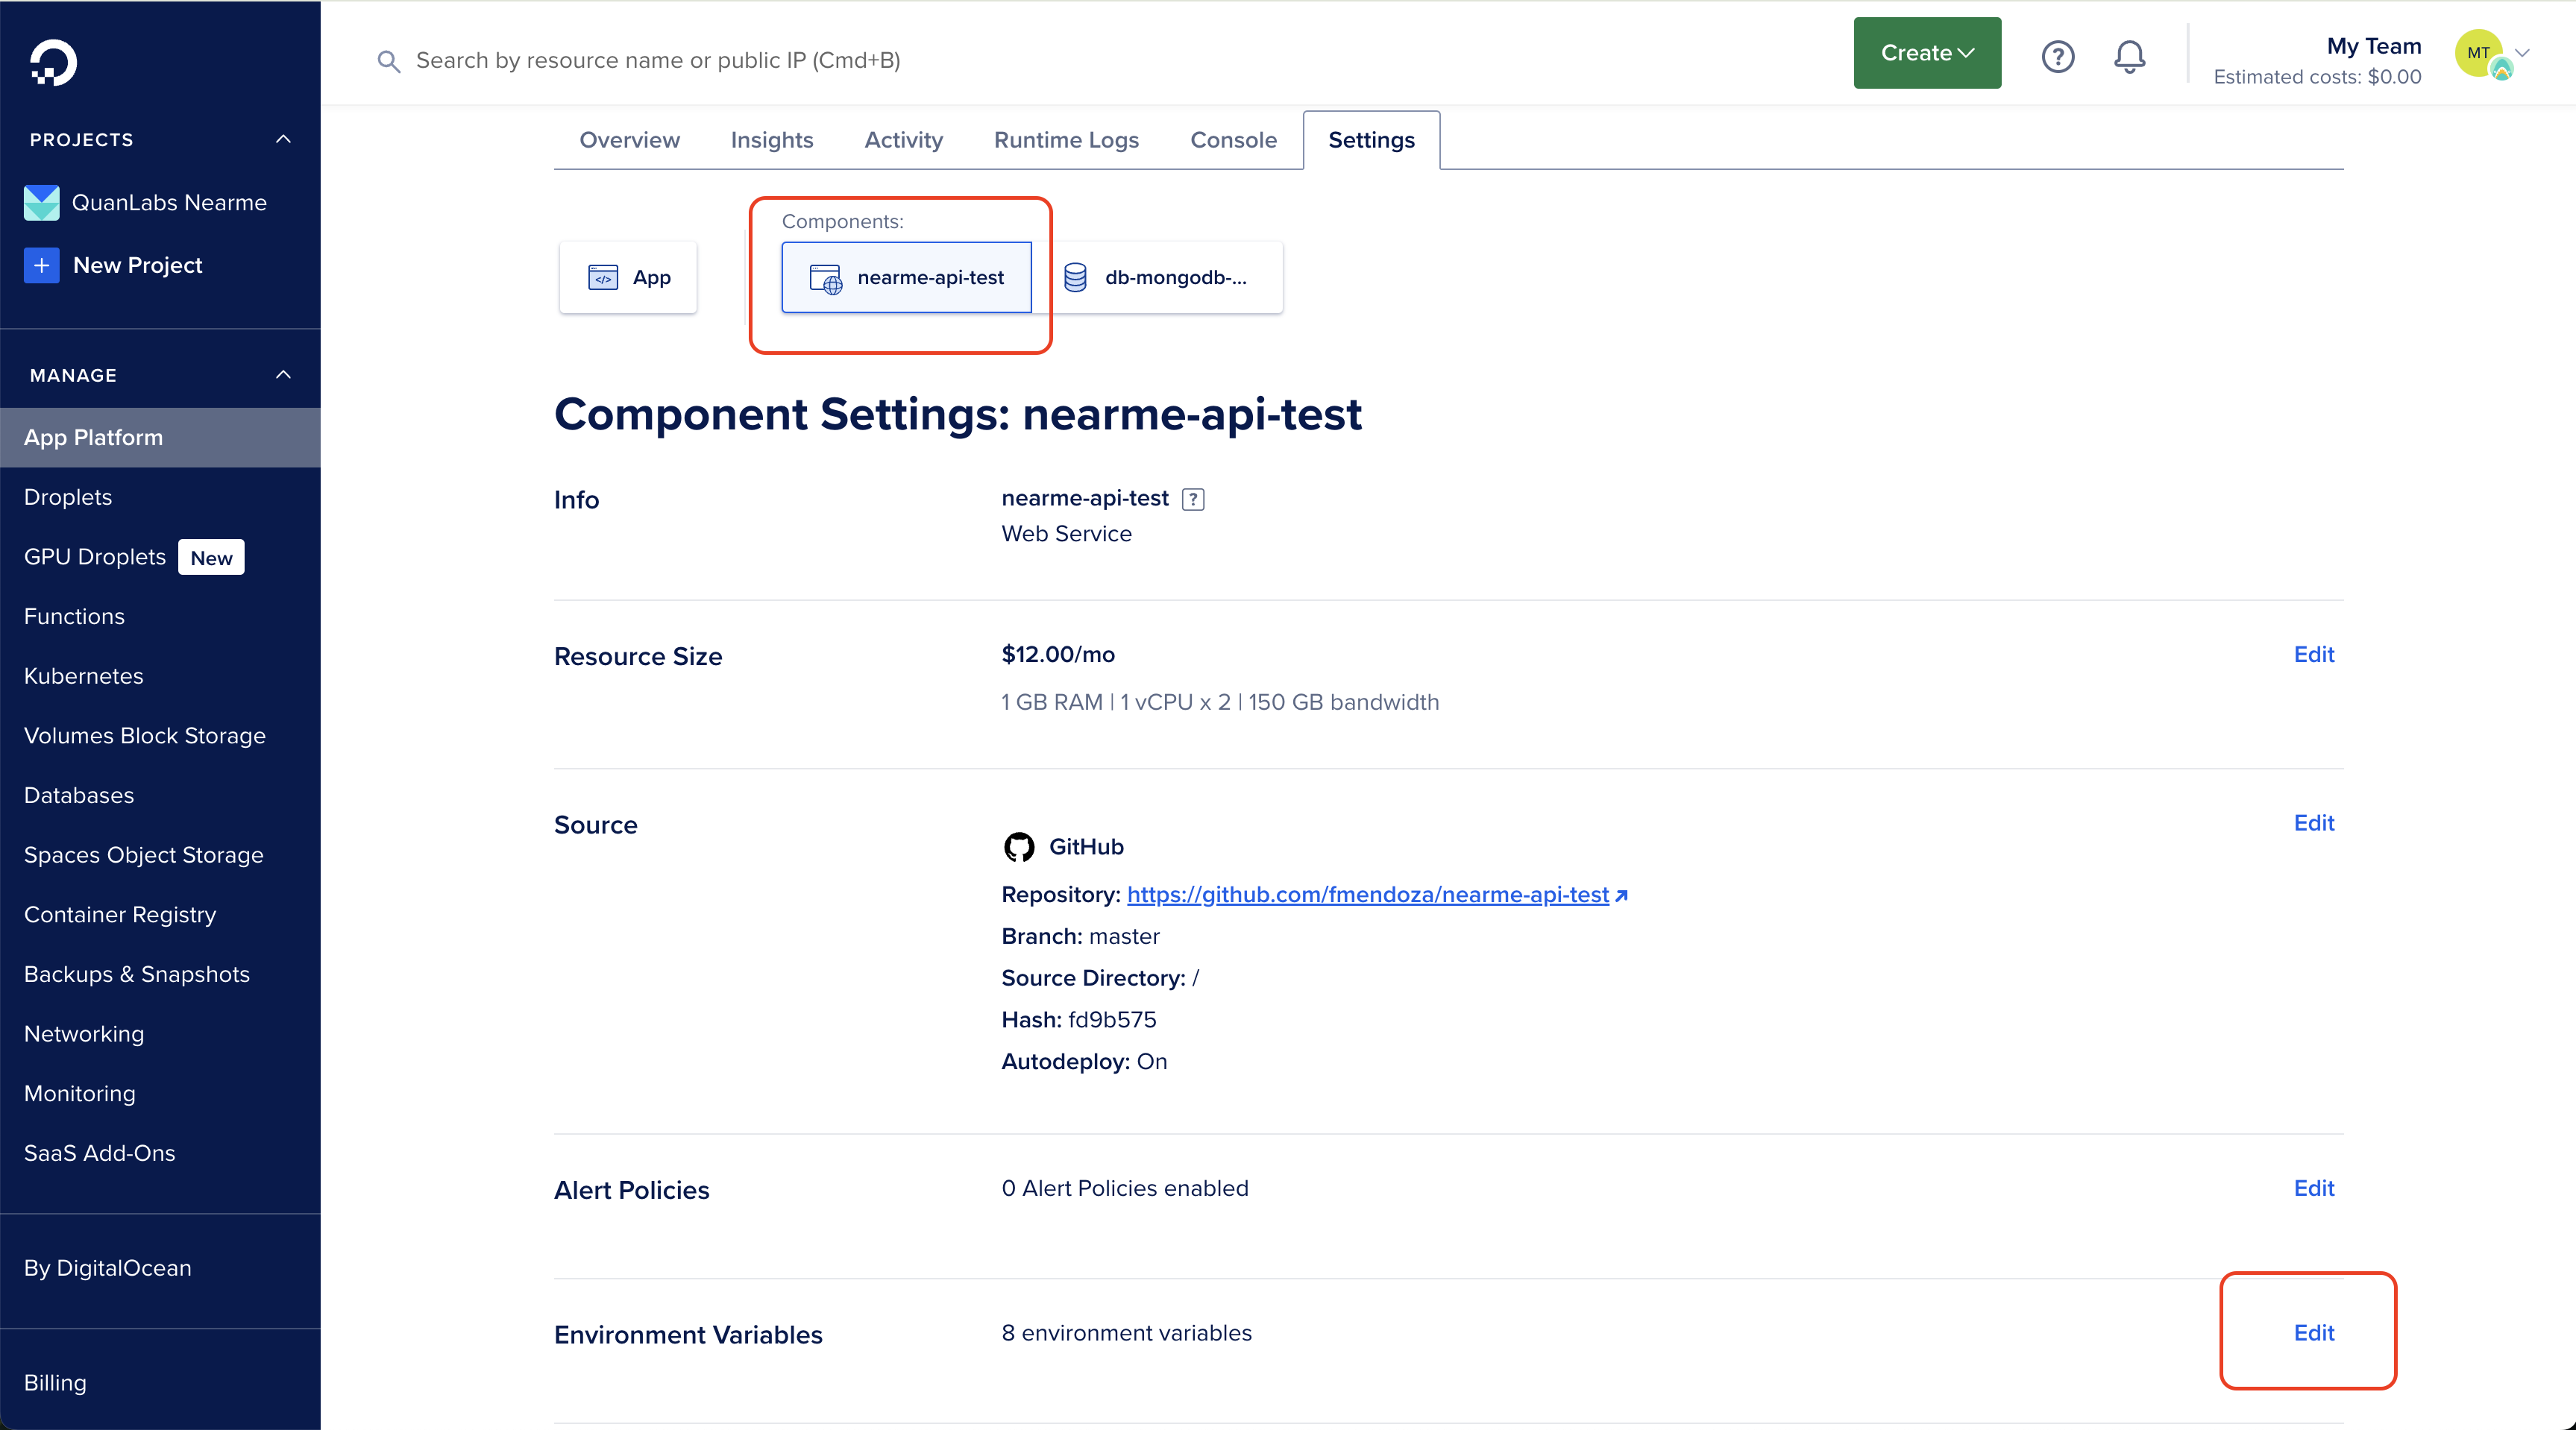
This domain can be used as PARSE_API_PUBLIC_URL. Go to Settings, and select the web service component. Under Environment variables, click Edit
Update PARSE_API_PUBLIC_URL and click Save to confirm the change.
To use a custom domain, select App and under Domains click Edit.
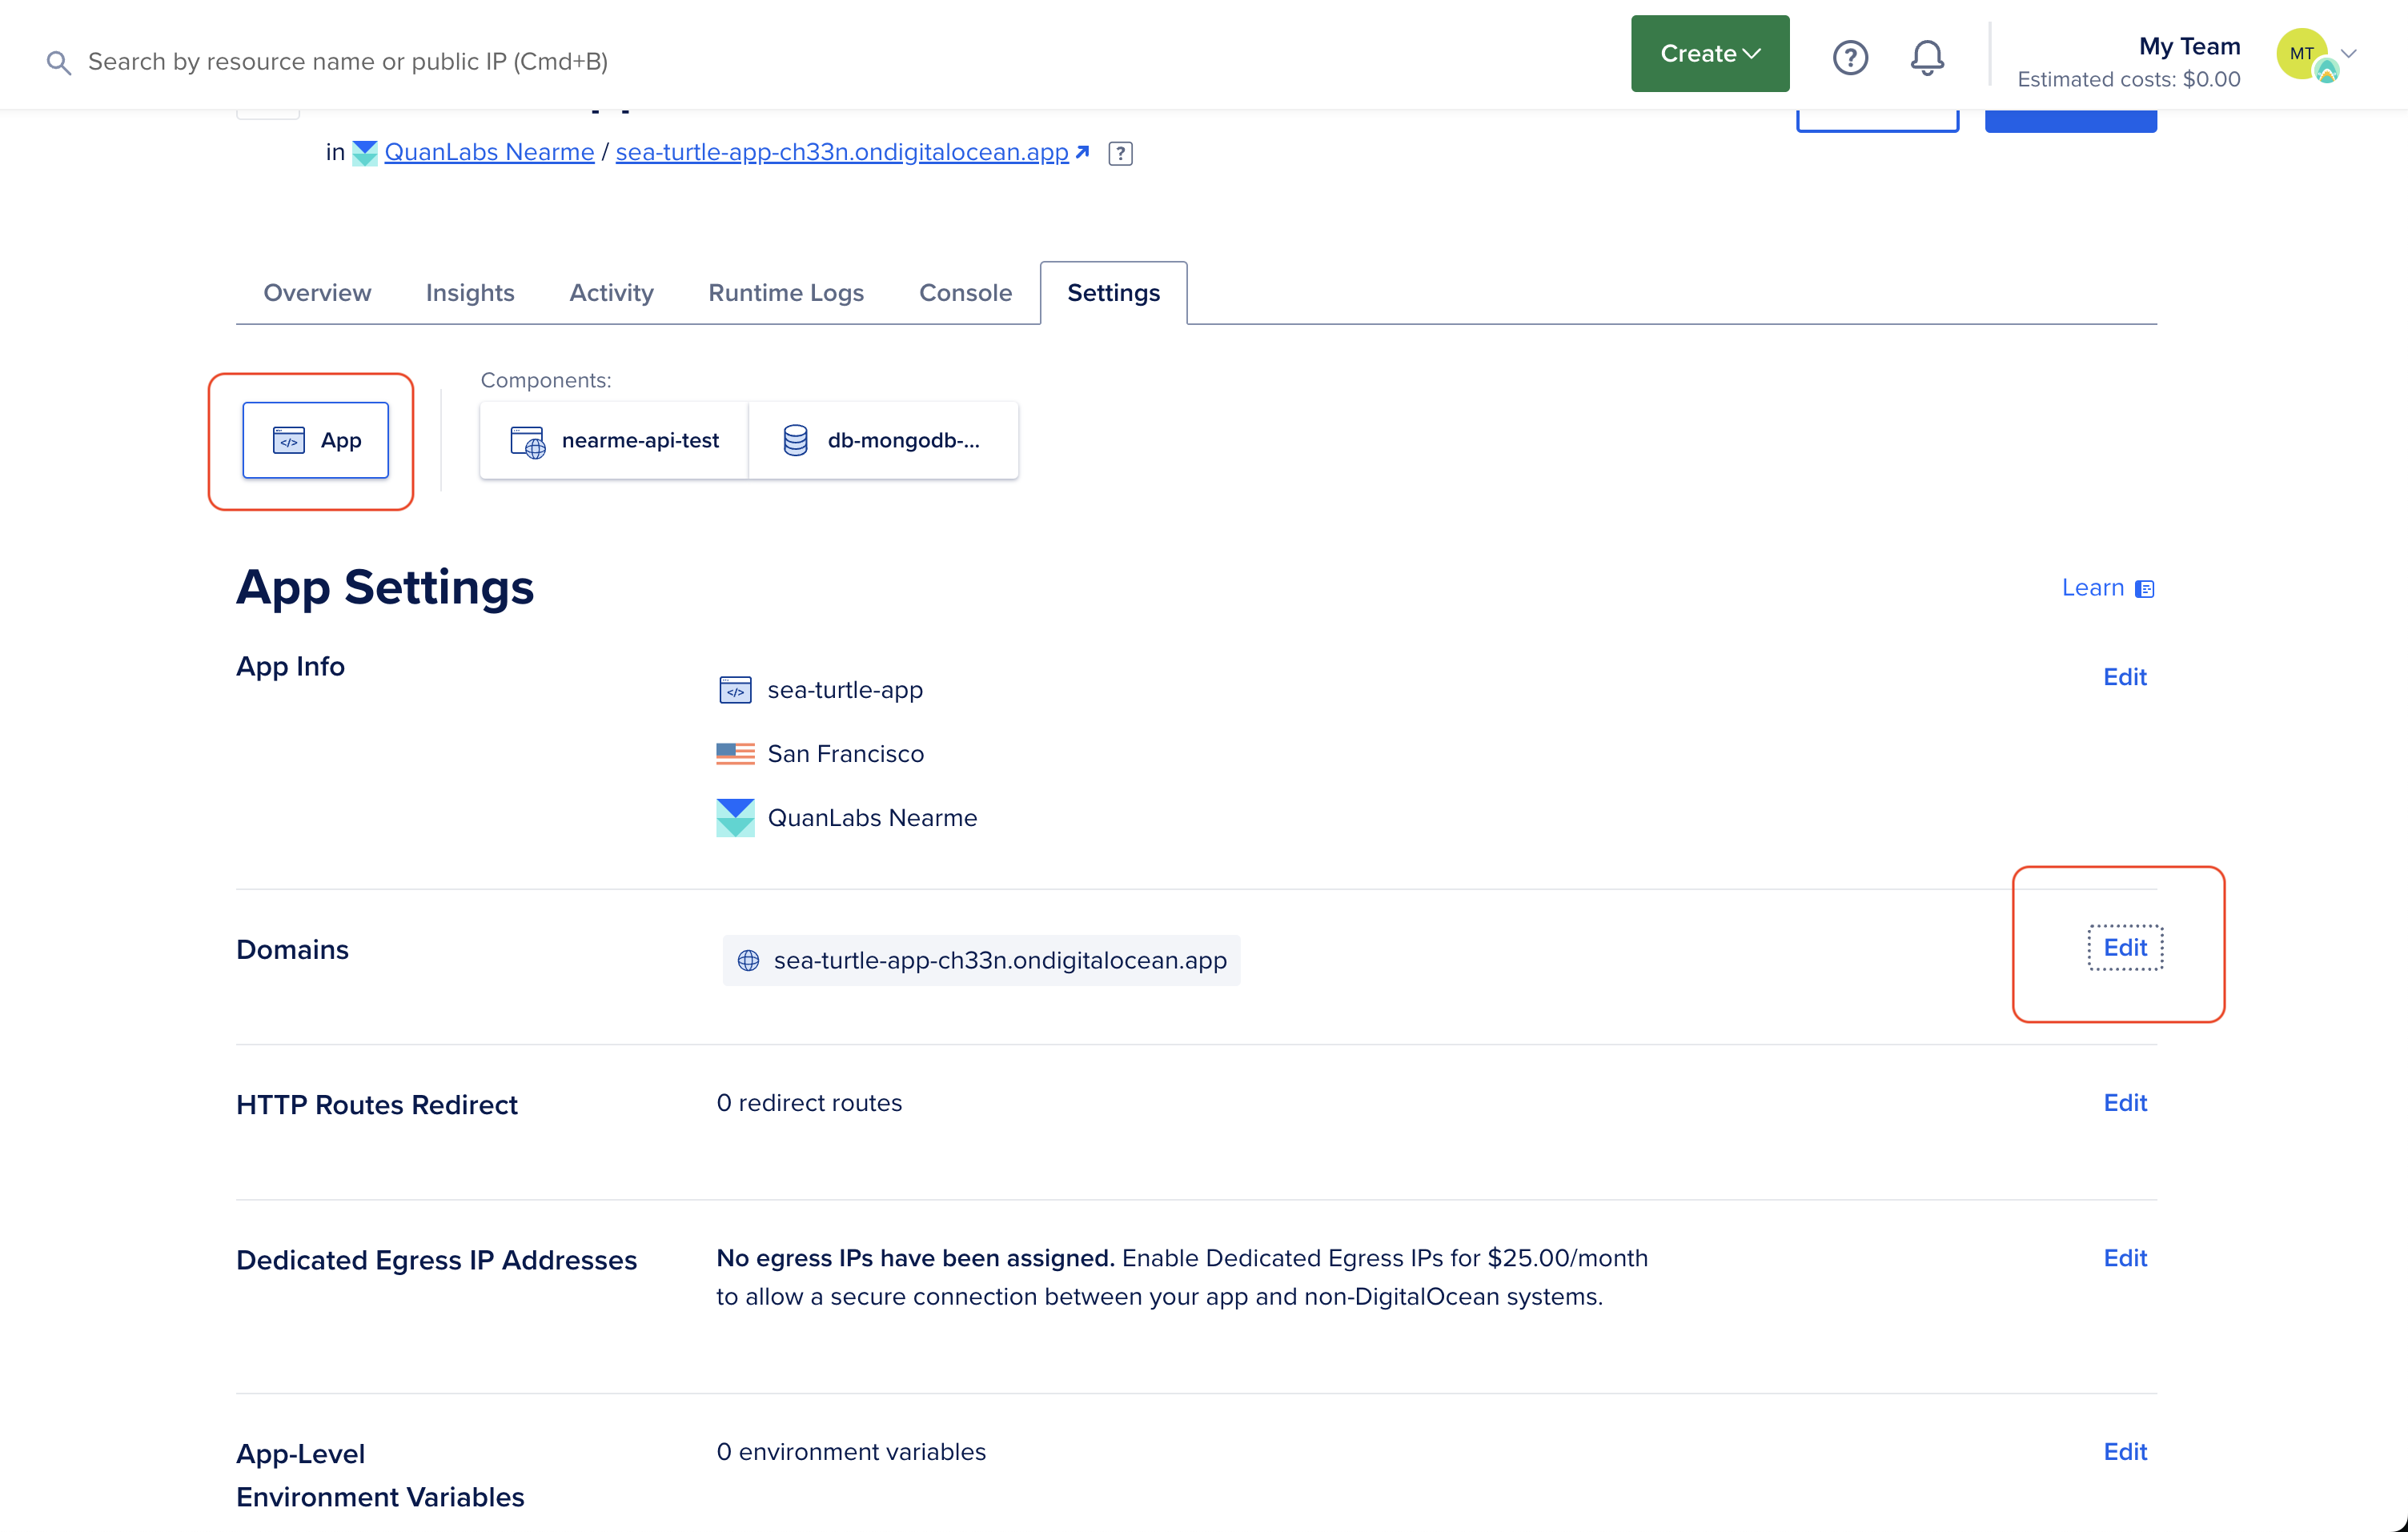
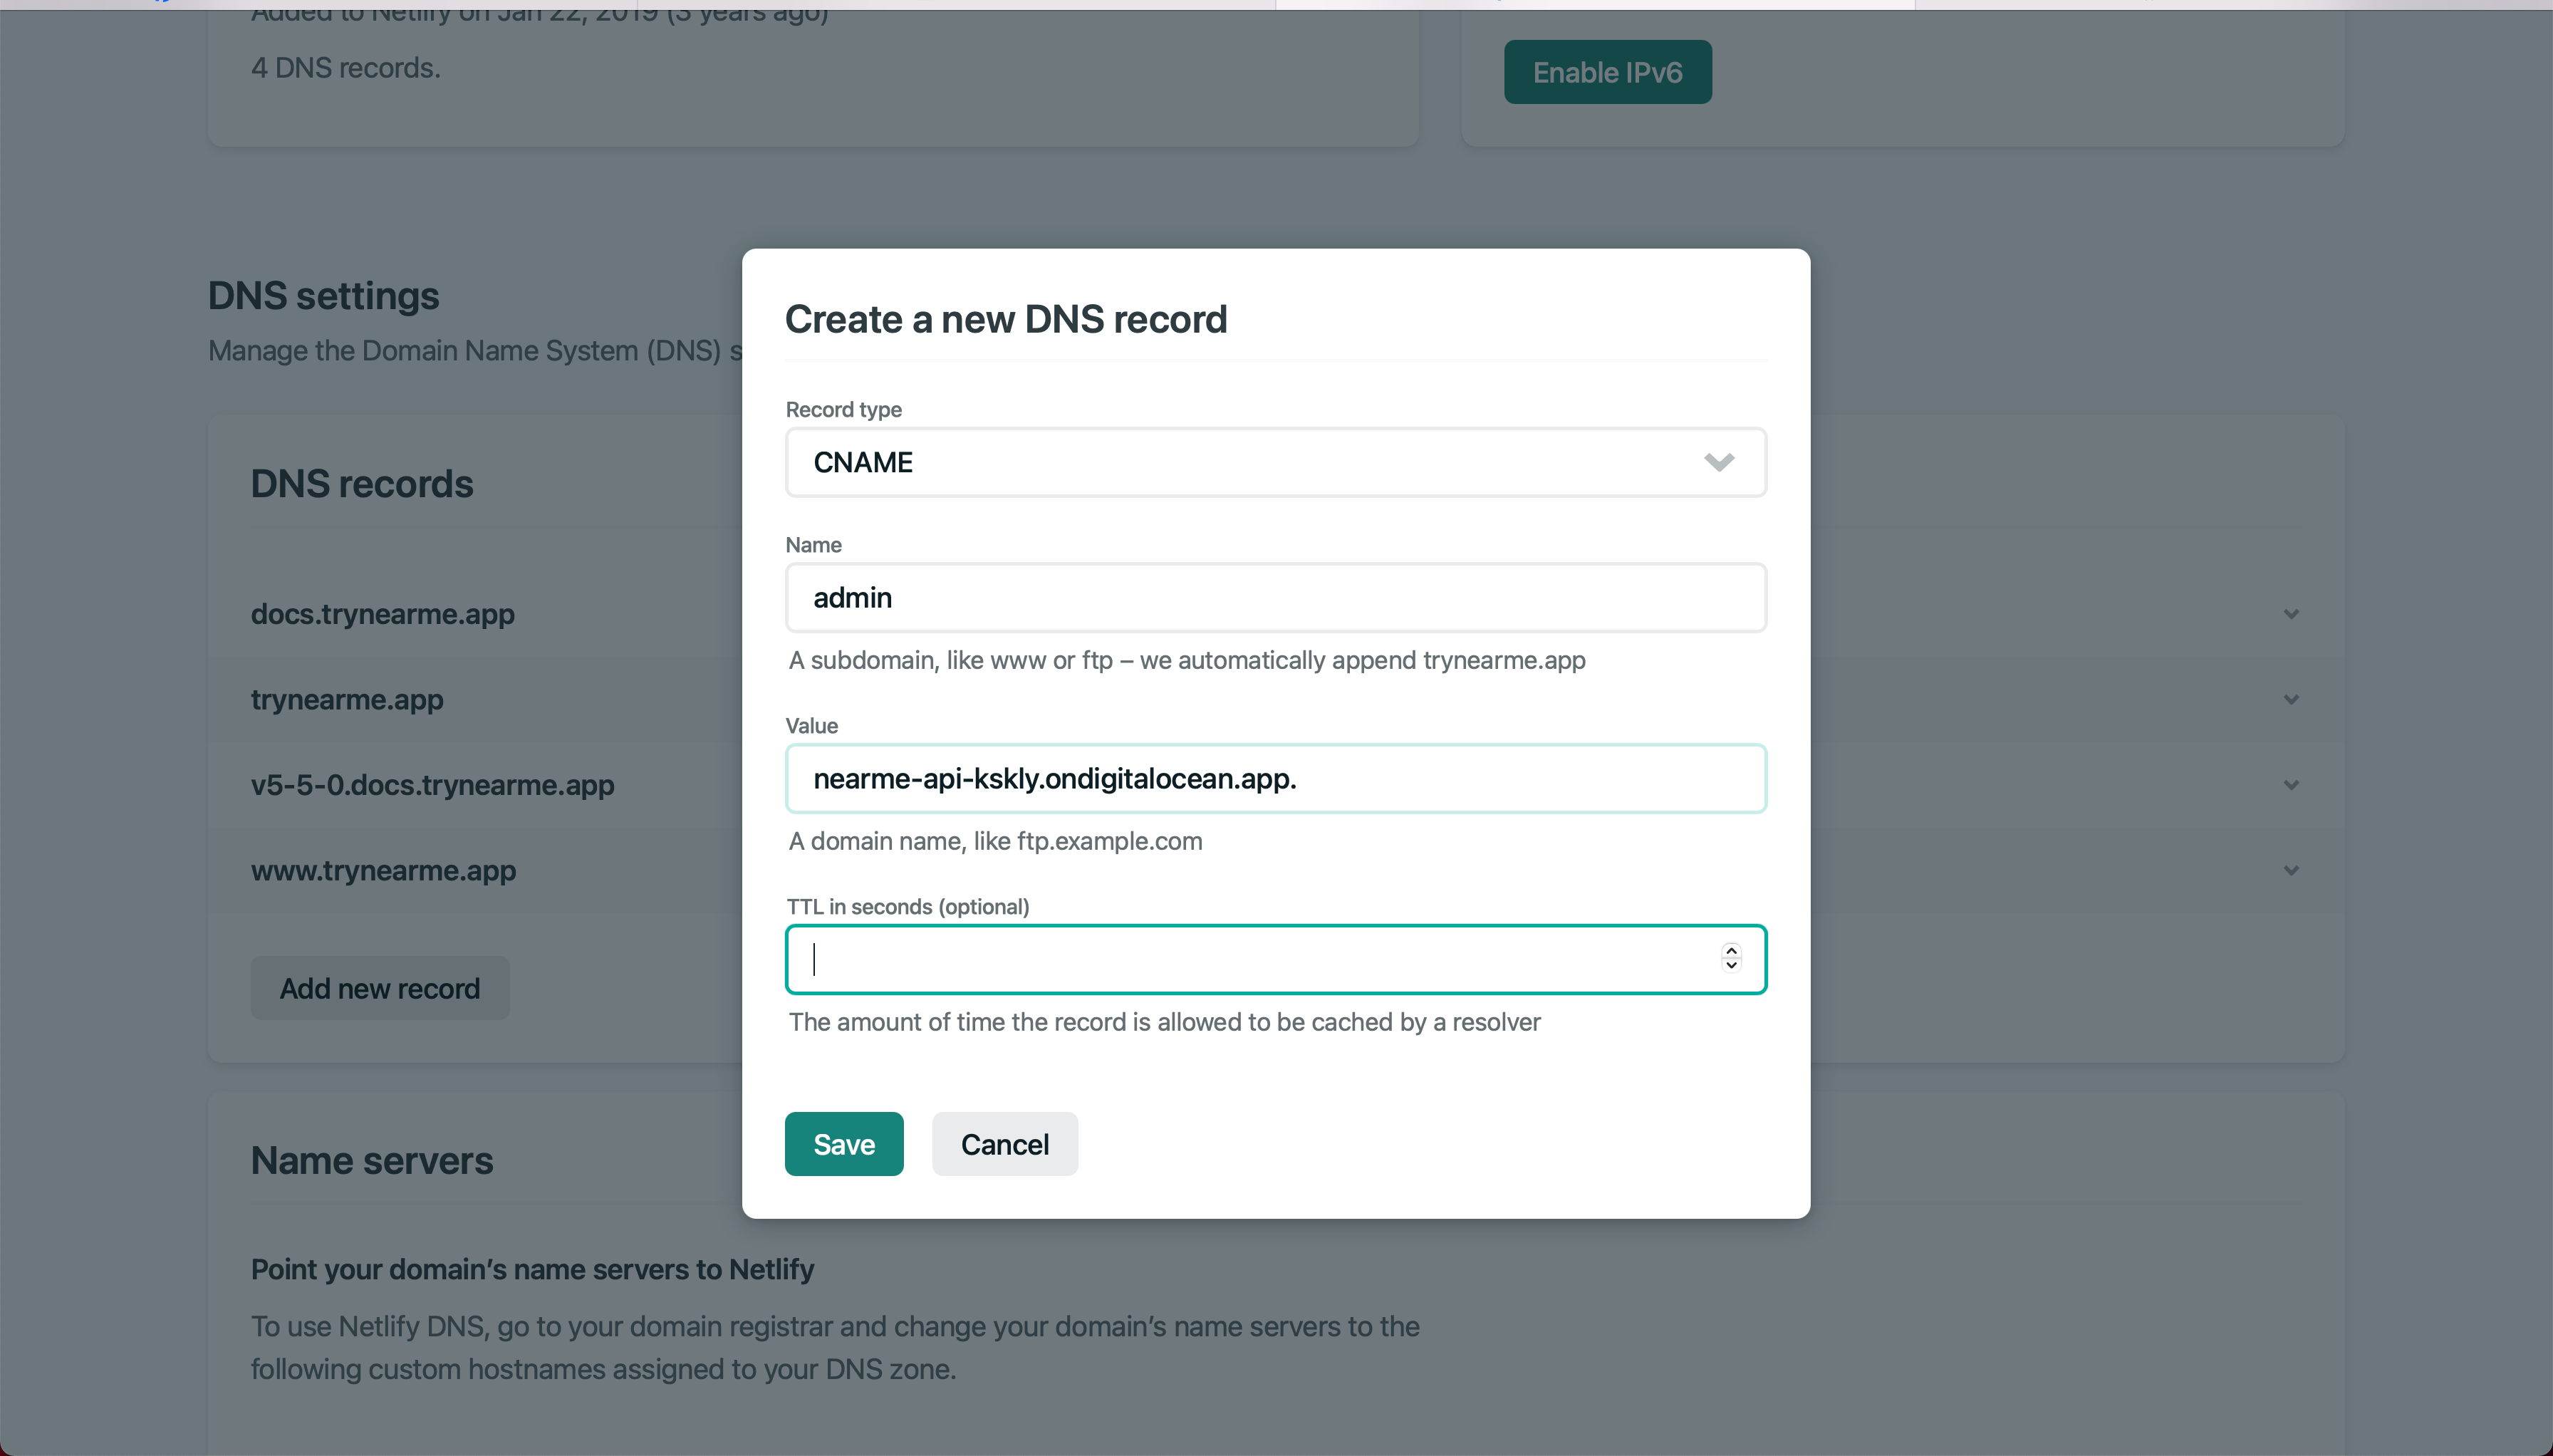
Depending in your situation, choose the option more suitable for you. We have our domain hosted on another provider. Therefore, we need to create a CNAME record as instructed.
This is how you add a CNAME record on Netlify. This step should be similar using others domain providers.
Create Super Admin user
Navigate to your app domain, and fill out the form to create the Super Admin, required to access the Admin Dashboard (Angular app).
The Parse Dashboard login page should appear. To access this dashboard, you need to enter your PARSE_DASHBOARD_USER and PARSE_DASHBOARD_PASS.
Setup File Storage
Go to Spaces Object Storage, and click Create Spaces Bucket.

Select a Region, type a unique name for the Spaces Bucket and click Create a Spaces Bucket.

On the left menu, navigate to API and under Spaces Keys, click Generate New Key.
Type a name for the access key, and click Create Access Key.
Once the key is created, it will display the access and secret key. Copy the secret key.

Go back to Spaces Object Storage, select your bucket and take note of your Origin Endpoint.

Navigate to App Platform, select your app and click Settings. Select the web service component, and under Environment variables, click Edit.
Add the following variables:
SPACES_ENDPOINTSPACES_BUCKET_NAMESPACES_BASE_URL(it must point to Origin Endpoint)SPACES_REGIONSPACES_ACCESS_KEYSPACES_SECRET_KEY

There are other variables that should be set:
CUSTOM_LANGPARSE_DASHBOARD_USERPARSE_DASHBOARD_PASSPARSE_DASHBOARD_USER_READ_ONLYPARSE_DASHBOARD_PASS_READ_ONLYSTRIPE_SECRET_KEYSTRIPE_WEBHOOK_SECRETMAILGUN_API_KEYMAILGUN_DOMAINMAILGUN_HOSTMAILGUN_FROM_ADDRESSMAILGUN_PUBLIC_LINKGOOGLE_MAPS_API_KEYPUSH_ANDROID_FIREBASE_SERVICE_ACCOUNT_FILENAMEPUSH_IOS_BUNDLE_IDPUSH_IOS_KEY_IDPUSH_IOS_KEY_FILENAMEPUSH_IOS_TEAM_ID
Click here to learn how to setup these variables. The only difference is that the variables should be added following the same steps described in this page.
Install Admin Portal
The steps to install the admin portal are pretty much the same as the instructions above.
Go to the /admin folder, initialize a new repo and push all the code to a Github.
Visit DigitalOcean and click on App Platform > Launch your App.
Choose GitHub as the source. Select the repo and click Next.
Under Type, choose Static site and click Next.
Enter your static site name and click Next.
Choose a plan and click Launch App.
It will take several minutes to build the dependencies and deploy the final code. Once the Deployed successfully! message appears, navigate to the app domain (appname.ondigitalocean.app), and you should see the Admin Portal login page. Here, enter your Super Admin credentials. That’s it!.